
Moving WordPress Host
Posted December 14, 2018 by Unlimited
So you’ve just bought your new WordPress Hosting account and are ready to begin migrating your WordPress installation over to ourselves. Worry not! This post will help guide you through the process and ensure it goes as smooth as possible.
Downloading Your Website’s Files and Database
First thing – backing up the files from your existing web host. This should be a pretty easy process, you’ll just need the FTP details from them so that you can login and download the files. For cPanel hosting you’ll typically need to pull them from the public_html folder but this may be different depending on how you are set up (if it is an Addon Domain, for example).
In this post we’ll be using FileZilla, but you can use any FTP software of your choice, it will just mean that some of the buttons may be in a different place.
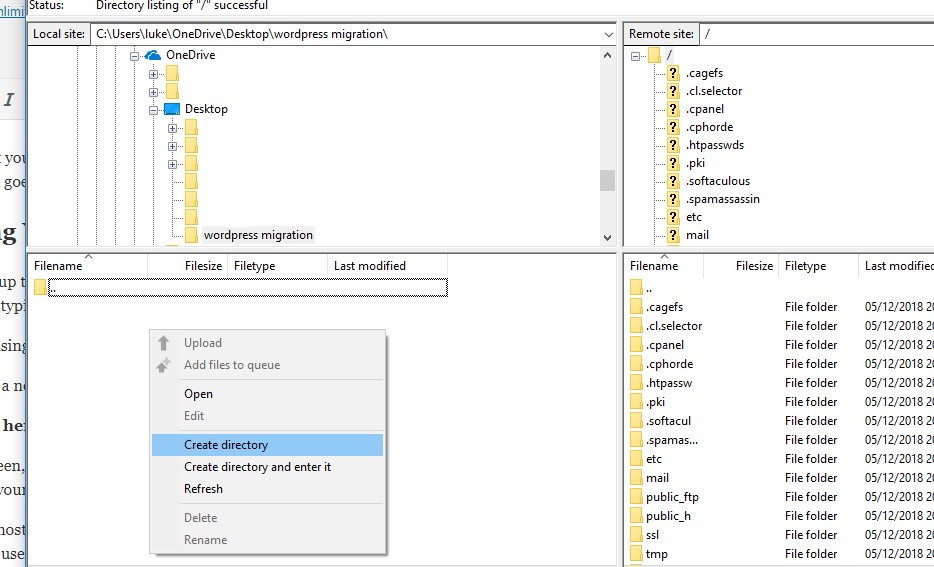
First step is to create a new folder on your local computer to store the files temporarily. You can do this in the section on the left as seen in the screenshot below.
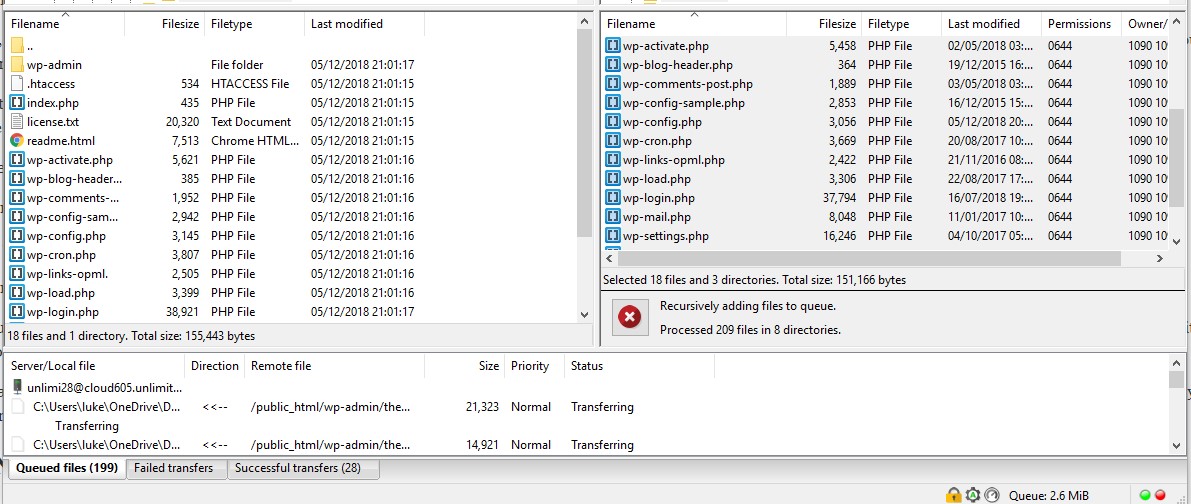
Next, in the right screen, browse to the folder containing your website files. Then, drag and drop them in to the folder on your computer. If you have a lot of files (such as photos or videos that you use in your posts on your website) then this may take a while. Sit back, relax, and grab a cup of tea while this goes on.
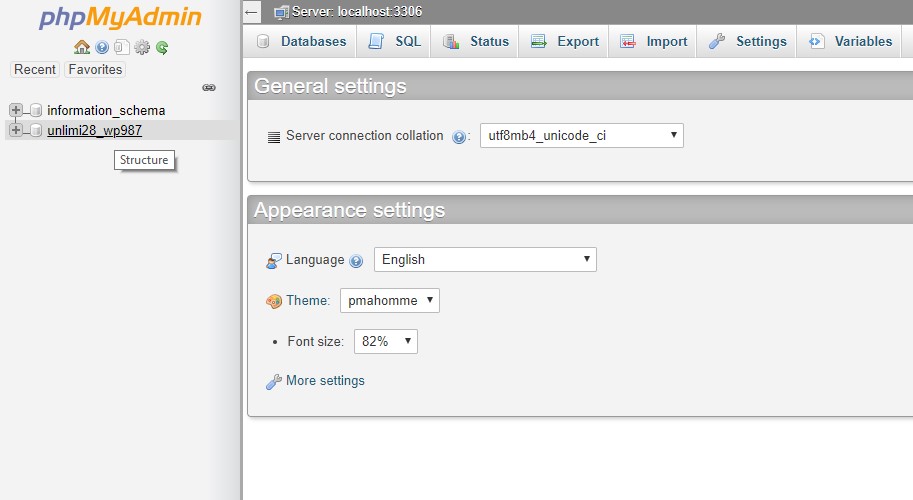
The next step is the most important step. You will need to backup the database. This contains all of your posts, settings and crucial things to make the website operate so we’ll need to be careful here. Most hosts will use a piece of software called PHPMyAdmin to allow you to access your database. From here, we can easily export and download the database.
You will need to first select the correct database from the section on the left in the screenshot below:
Then proceed to head to the ‘Export’ tab and click ‘Go’
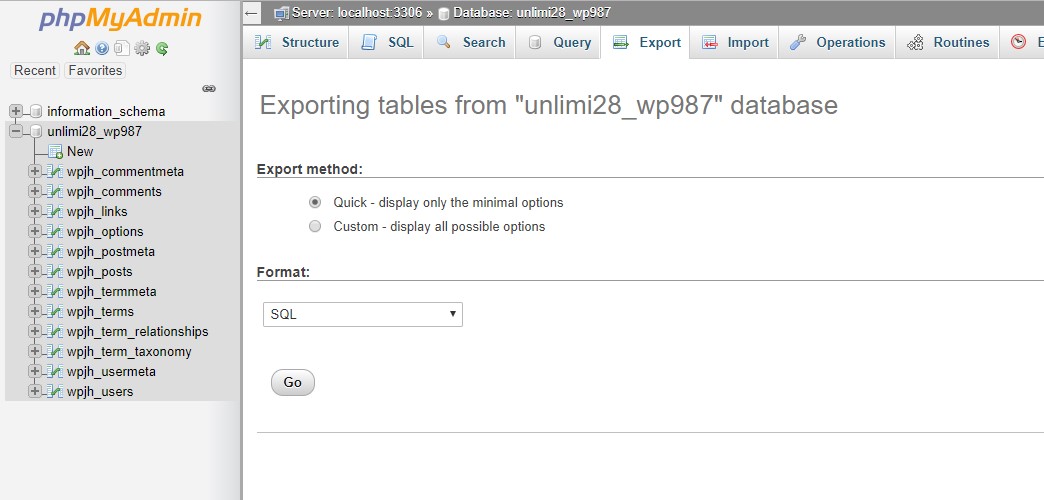
The default settings should be perfectly fine for this, and it should download pretty quickly. If you find any errors in doing this then you should contact your current host and ask them to export it manually and provide you with the .sql file.
Great. We’ve got the data! Now, it is time to upload these to your new Unlimited Web Hosting account. We provide both Plesk and cPanel web hosting, so will cover both in this article. You’ll only need to follow the parts relevant to the control panel you picked.
Creating The New Database
For cPanel Hosting
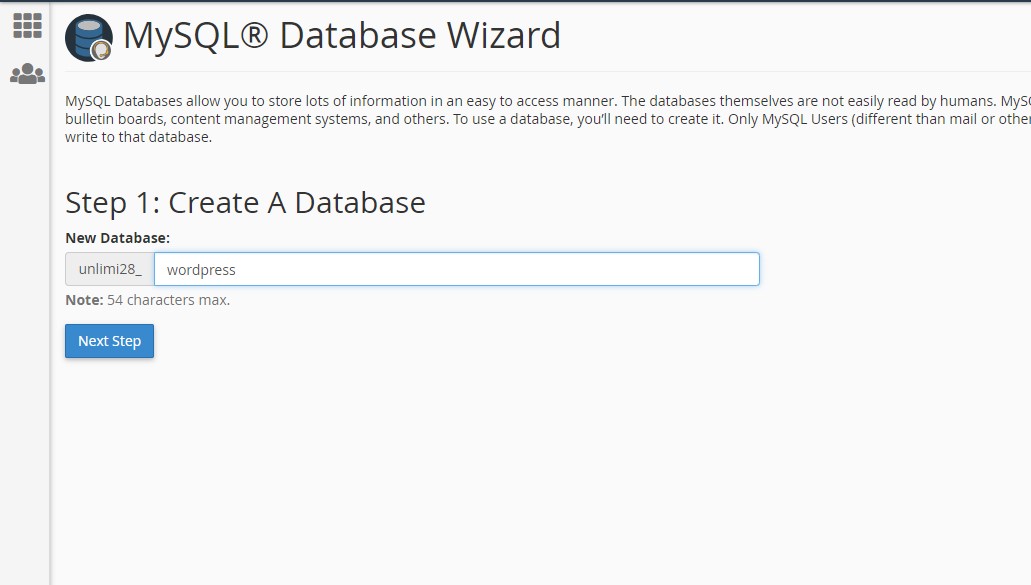
In cPanel there is a great built-in wizard that will guide you through everything. You just need to head to ‘MySQL Database Wizard’ within cPanel and follow the prompts to get started.
The first step is to create the database, you can name it anything you wish but please write this down or take a note of it somewhere. We will need to update a configuration file for WordPress with this later on.
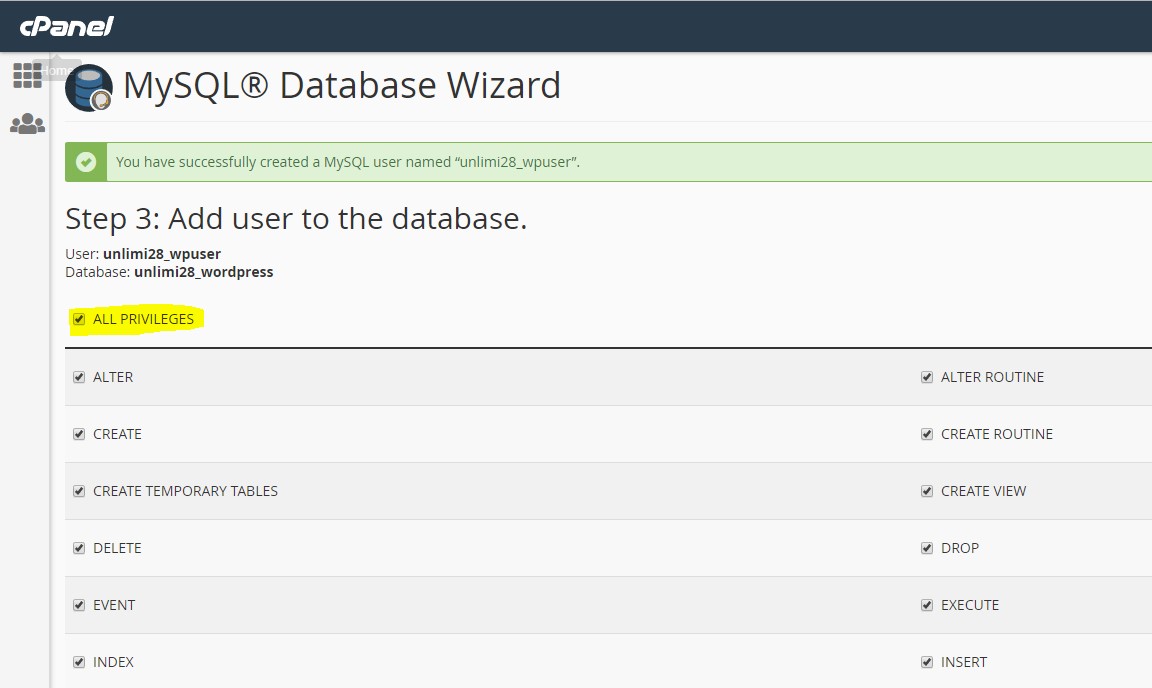
The next step is to create the database user, here you’ll create a username and password that WordPress will use when it needs to access the database behind the scenes. Again, these can be anything you wish but it is very important that you make a note of these somewhere as they will need to be provided in the configuration file.

The final step is permissions, just tick to add all permissions and click ‘Done’.
With that, we are done with the database steps in cPanel, proceed to the next step for uploading your database backup!
For Plesk Hosting
If you opted to take Plesk with your web hosting account, then here are the steps you need to follow.
Login to your Plesk account, and head to the Domains tab. You may already be here if you have just logged in. Now, under the domain that you will be uploading Plesk to, click on Databases.
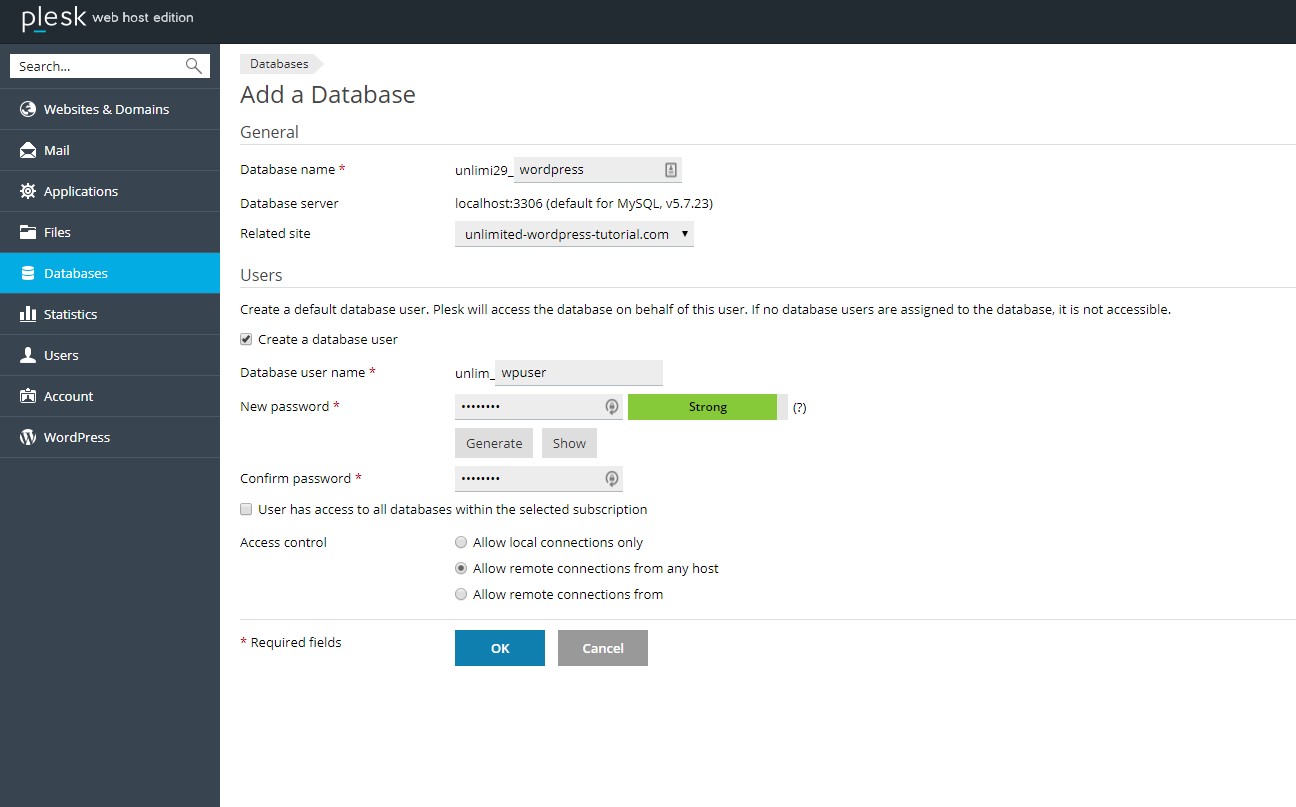
From there, click on Add New Database.
Provide the database with a name and create the user for the database here. Make sure you select the correct website from the Related Site drop-down. You’ll need to make a note of all of this as we’ll need to update the WordPress configuration file later on.
Uploading Your Database Backup
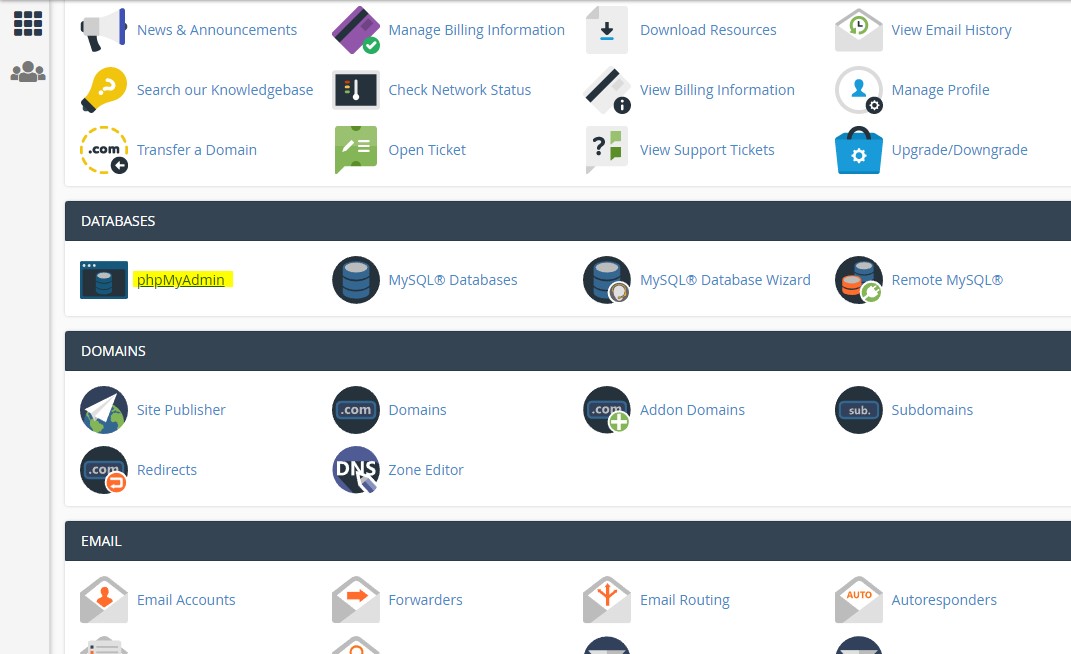
Now, you’ll need to head to PHPMyAdmin. Within cPanel this is accessible on the home page like below.
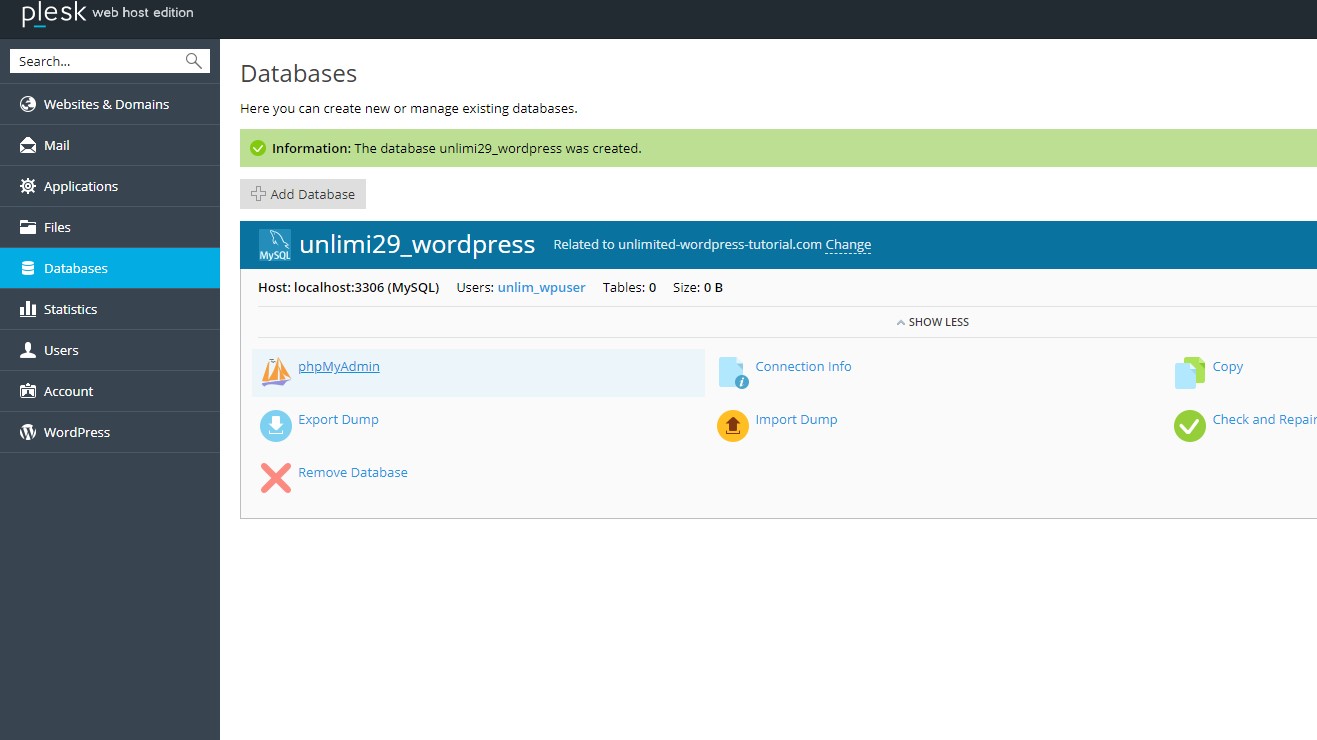
In Plesk you can find it under the right database in the list you are taken to once the database is created.
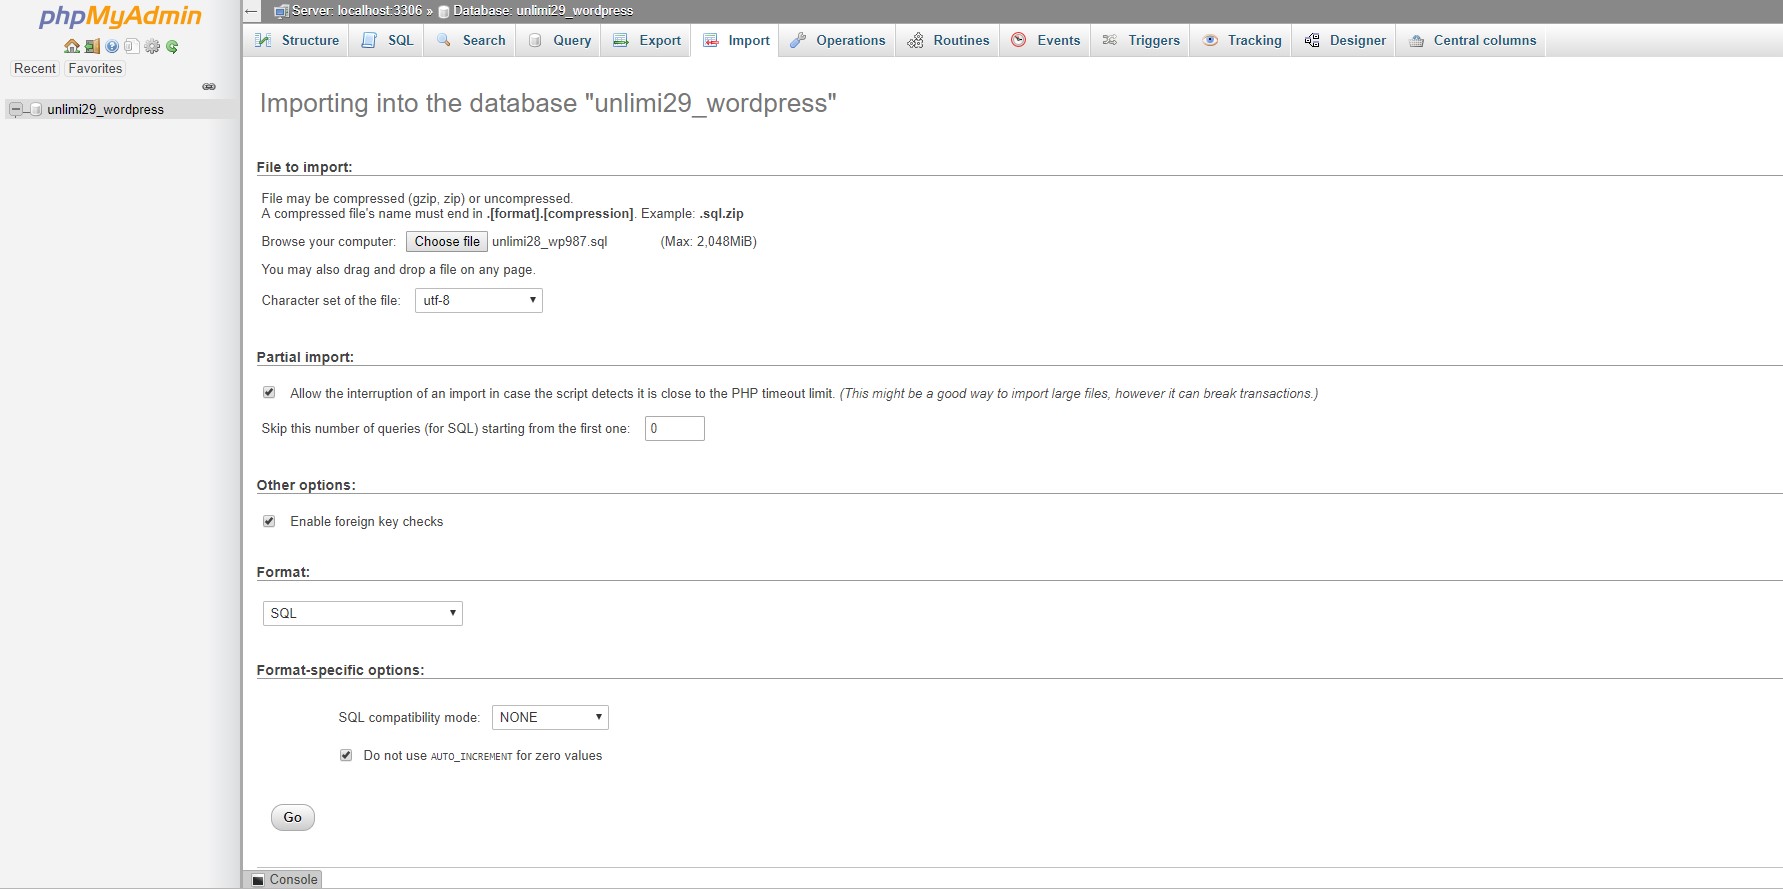
From here, simply head to the import tab and upload the file that you exported earlier. This may take a while to process if you have a lot of data, but it shouldn’t take too long.
Uploading Your Website Files
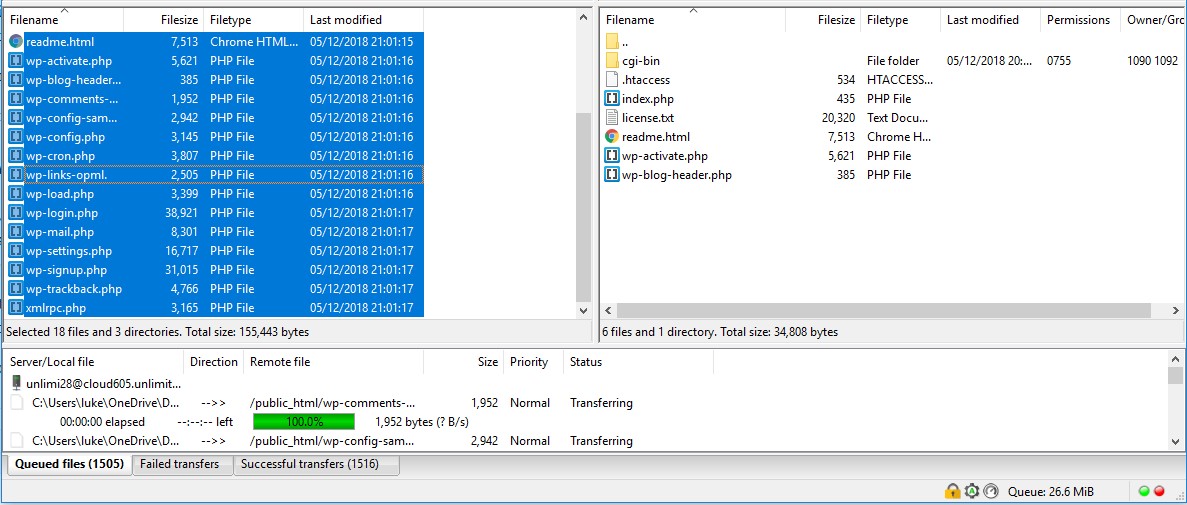
Now for the biggest part – uploading your website data. Just connect your FTP client to the new web hosting account with us and drag and drop the website files into the right folder. For Plesk, this will be httpdocs and for cPanel it will be public_html.
Now, just sit back and relax. Have another cup of tea. You’ve earned one.
Once that’s done, just one more step left and then it’s testing!
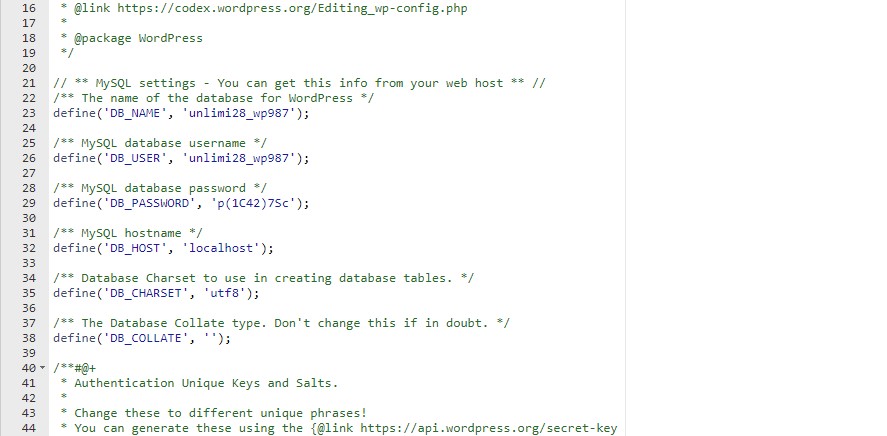
Fixing Your Configuration File
The final step before we check things over is to make sure the information is correct in the configuration file. As we use the format controlpanelusername_databasename for our databases, if your account with us uses a different username then this can cause an issue. Its an easy fix, from within the control panel File Manager just open the wp-config.php file and check the section in the screenshot below to make sure they match the details from when you created the database and user on our platform earlier.
Once that is done, just simply hit save and proceed to testing!
Testing Your Website
Great, so we’ve moved everything over and ensured the database is connecting correctly we just need to test it. If you have already updated your domain to point to us you will need to wait for it to propagate (point to our server rather than your old host) however if you wish to check your website before updating your domain you will need to update your hosts file to point the domain to our server. If you need a hand with this, please reach out to our support team who can offer some guidance.
You should hopefully not see any errors! Sometimes plugins can require certain PHP features that aren’t enabled by default or your website may require an older PHP version. If you check it and have some errors or problems, please let us know and our amazing support team will be right on it.
That’s all for now! See you in the next post!
Categories: Web Hosting, WordPress