
PHP 7 and OpCache – Speed Up Your Website
Posted September 7, 2016 by Unlimited
If you are looking for a significant increase in your site’s performance then you should look into switching to using PHP 7 with Opcache.
Performance increases of over 100% have been reported, with WordPress sites running more than twice as fast with PHP 7 compared to PHP 5.6.
How does PHP 7 improve your site’s performance?
The enormous increases in speed of PHP 7 are the result of improvements to the Zend Engine, the use of opcode caching and improvements in the data structure. This results in an improved data structure, a reduction in memory requirements and memory management that is more efficient.
How does OpCache work?
PHP scripts are usually compiled at runtime, which means that part of the computing time is required to convert the code and have it ready. With Op Cache this conversion is calculated once, then pre-compiled and saved as a machine readable script in the cache.
When this script is needed it can be loaded extremely quickly from the cache, which in most cases improves the speed of the site significantly.
OpCache is of particular benefit to large websites, such as eCommerce and company sites, which are able to handle far more requests simultaneously when OpCache is enabled.
Compatability considerations of PHP 7
While PHP 7 is generally compatible with older versions of PHP, some conflicts can occur. Joomla 3.4 has issues with PHP 7 for example, but as of Joomla 3.5 these problems have been fixed.
We recommend testing PHP 7 with your site’s plugins and scripts in a development or test environment first, and if there are no issues roll the updates out to your live site.
Activating PHP 7
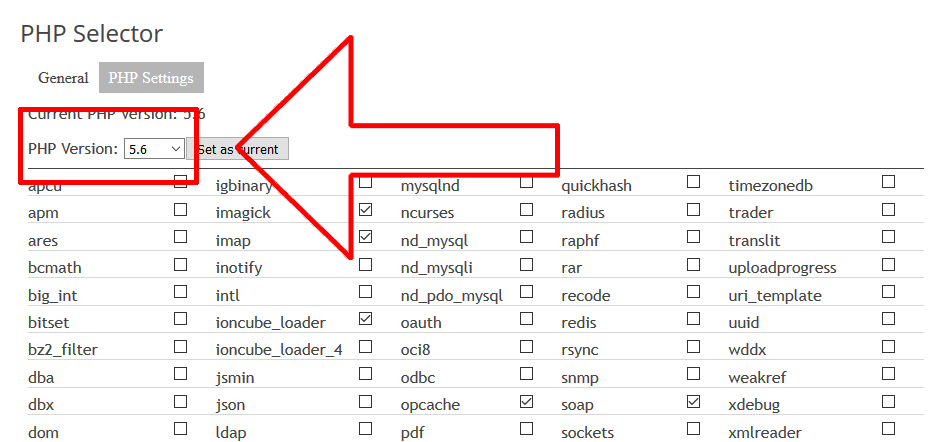
You can activate PHP 7 on Plesk or cPanel, depending on the control panel that you are using. In both instances, you need to login and open the PHP Selector.
When the PHP Selector page opens, click the dropdown menu next to PHP Version and select 7.
Activating OpCache
Once you have set your PHP Selector to PHP 7 you can activate OpCache for your website.
Activating OpCache requires that you setup a folder for the cached files in your webspace and add a few lines of code to your php.ini file in the root of your site.
Create a folder for cached files
Login to your webspace using ftp, then in the root directory create a folder for the cached files. Name the folder something like “.opcache” (without the speachmarks), the point at the beginning of the name will make Apache automatically protect the folder.
Add some lines to the php.ini file
Open the php.ini file, found in the root folder of your website, and add the following code:
zend_extension=opcache.so;
opcache.enable=1;opcache.memory_consumption=32;
opcache.interned_strings_buffer=8;
opcache.max_accelerated_files=3000;
opcache.revalidate_freq=180;
opcache.fast_shutdown=0;
opcache.enable_cli=0;
opcache.revalidate_path=0;
opcache.validate_timestamps=2;
opcache.max_file_size=0;
opcache.file_cache= …/home/user/public_html/.opcache;
opcache.file_cache_only=1;
Note that the value for opcache.file_cache (highlighted above) must be the absolute path to your webspace.
Save your changes to the php.ini file and upload it to your webspace, overwriting the original.
Verify everything is working
After OpCache has been enabled and your website has been accessed a couple of times you will notice that the .opcache folder will have some cached files inside it. If there are no files inside, it’s likely that value for opcache.file_cache in the php.ini file is incorrect, check the path and try again.
Categories: cPanel, Plesk, Web Hosting