
Add a custom email domain to iCloud Mail
What is iCloud Mail?
iCloud Mail is Apple’s mail service, use it to create an email address to use across all Apple devices. Emails set up in iCloud should have either an @icloud.com, @me.com, or @mac.com email address.
Since the introduction of iCloud+, you have been able to set up your custom domain email in iCloud. The primary benefit of this is that it utilises iCloud’s advanced inbound & outbound spam filtration. Other benefits include:
- Seamless integration with other Apple products, without the need for additional setup.
- Off-site independent backup.
- Disconnecting from your hosting package, putting less load on your hosting package.
Set up iCloud Mail
Before attempting to set up iCloud Mail, you’ll need to create an Apple ID.
Setting up iCloud Mail on your device is the first step to getting your custom domain name on. This process is easy and is supported across multiple devices, including Windows.
iOS or iPadOS.
1. To start, open or unlock your device.
2. Afterwards. Open the settings application by clicking the grey/silver cogwheel icon.
3. Next, click your “name/Apple ID”.
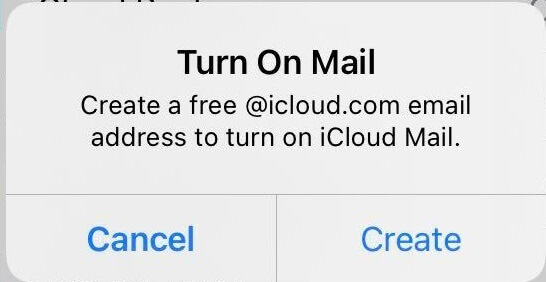
4. Finally, click “iCloud” and when prompted click “create”
macOS
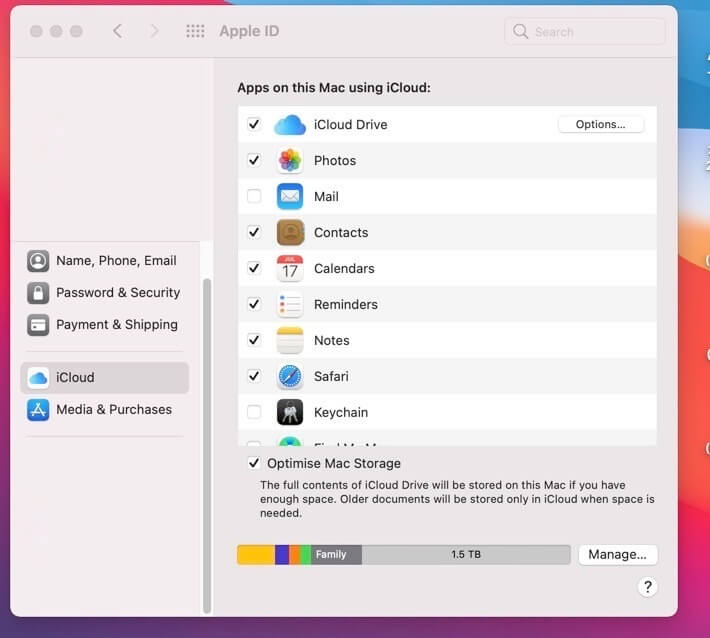
The setup process on macOS follows a similar procedure as above. Open the systems preferences area by clicking the same cogwheel icon as above. Then select your Apple ID, iCloud, and then the Mail application.
Windows 10
1. First off, download iCloud via the Microsoft app store.
2. Afterwards, once it has been downloaded or when prompted. Restart your device.
3. Once your device has restarted fully, open the iCloud Application.
4. Sign in to your iCloud account using your Apple ID.
5. Finally, ensure that the mail checkbox is ticked and hit apply.
Adding your custom domain to iCloud Mail
To enable custom domains, you need an active iCloud+ Subscription.
1. Firstly, log in to your iCloud account. This may require an additional device for authorization.
2. Next, from the main splash page, click Account Settings.
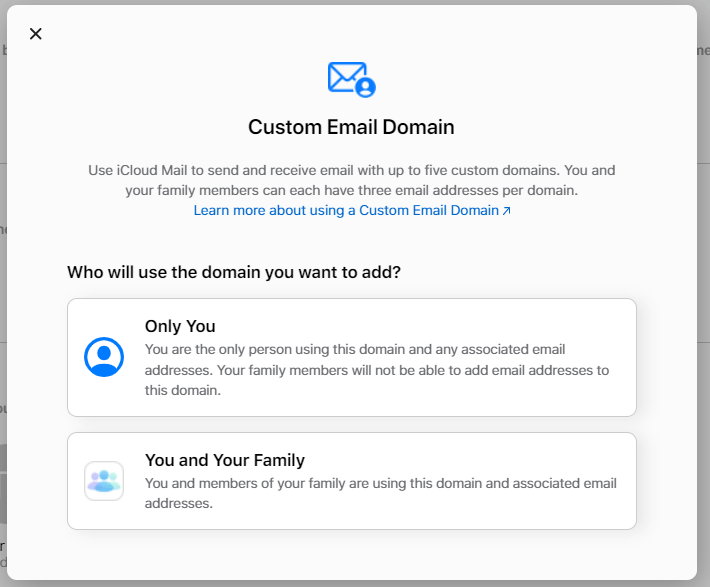
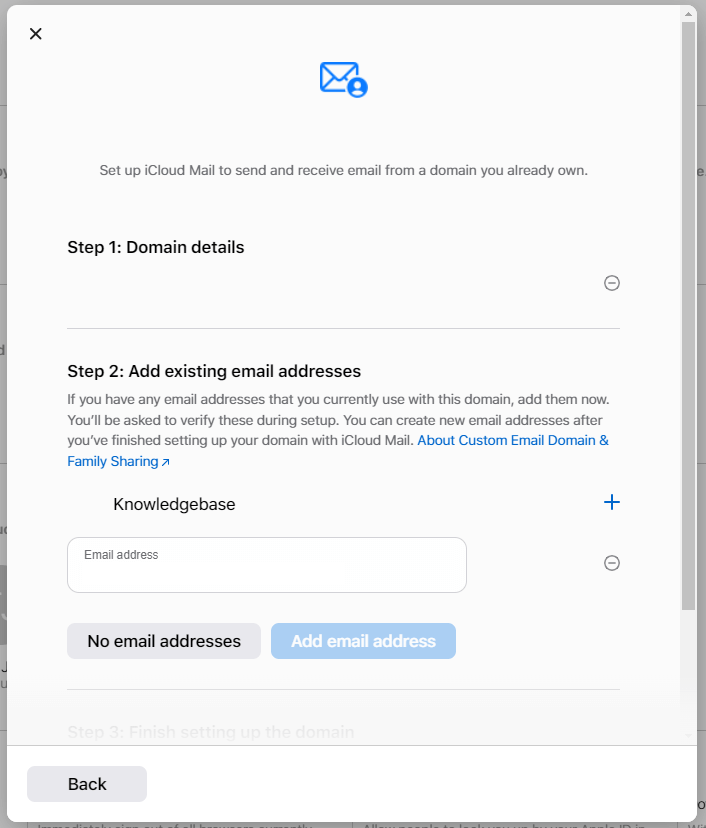
3. Afterwards, scroll down and click Manage under “custom email domain”. It is possible to configure your email domain name for personal or shared use as shown.
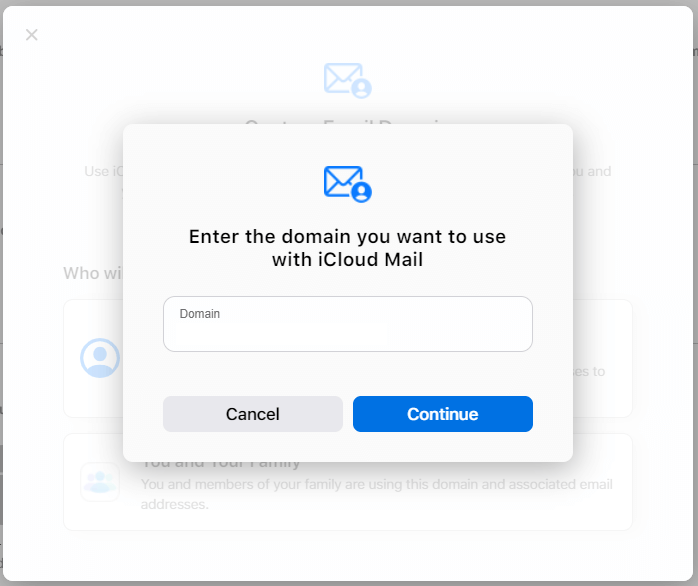
4. Now, enter the domain name you wish to use with iCloud+.
5. If you have any, you can add any existing email addresses for your domain now. Otherwise, continue on.
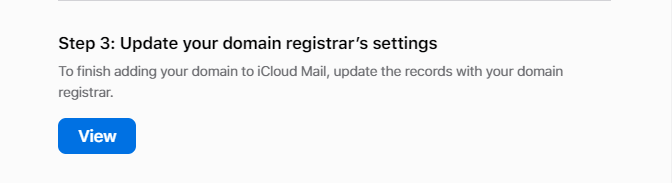
6. Afterwards, you will be prompted to configure your custom domain name via your registrar. You can do this easily on our cPanel hosting.
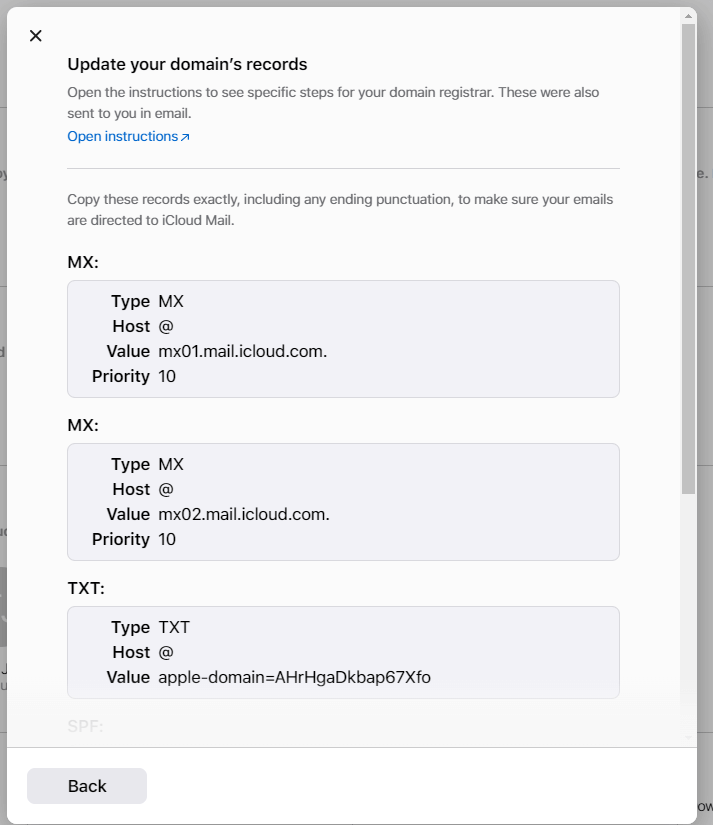
7. To complete set-up, configure your DNS records in the cPanel zone editor. These will need to match the supplied iCloud Mail DNS records.
Update your DNS Zone & Complete Set up
The following records are formatted for use in cPanel but not ready. Refer to the records provided by Apple and match them up with the following records.
MX
- Type: MX
- Host: yourdomain.tld.
- Value: mx01.mail.icloud.com.
- Priority: 10
MX
- Type: MX
- Host: yourdomain.tld.
- Value: mx02.mail.icloud.com.
- Priority: 10
TXT
- Type: TXT
- Host: yourdomain.tld.
- Value: [Unique and provided during iCloud set up]
SPF
- Type: TXT
- Host: yourdomain.tld.
- Value: v=spf1 include:icloud.com ~all
DKIM
- Type: CNAME
- Host: sig1._domainkey.yourdomain.tld.
- Value: sig1.dkim.yourdomain.tld.at.icloudmailadmin.com.
After entering these records, allow some time for your DNS changes to propagate, then follow on from step 4 in iCloud by clicking Finish setup.