
How to create a cPanel account from WHM
As a reseller hosting customer, you also get access to WHM (Web Host Manager), this allows you create a cPanel account, giving each user a private, isolated environment to manage websites, email, and other services. Use them alongside your custom hosting packages to and streamline your web hosting business. In this guide we’ll walk through the process of setting up new cPanel accounts for your clients.
Create an account in WHM
1. Log in to your WHM account.
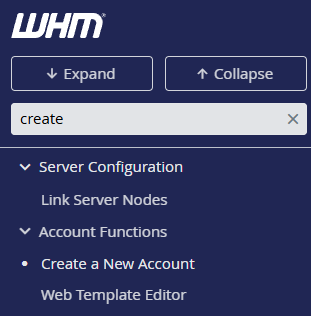
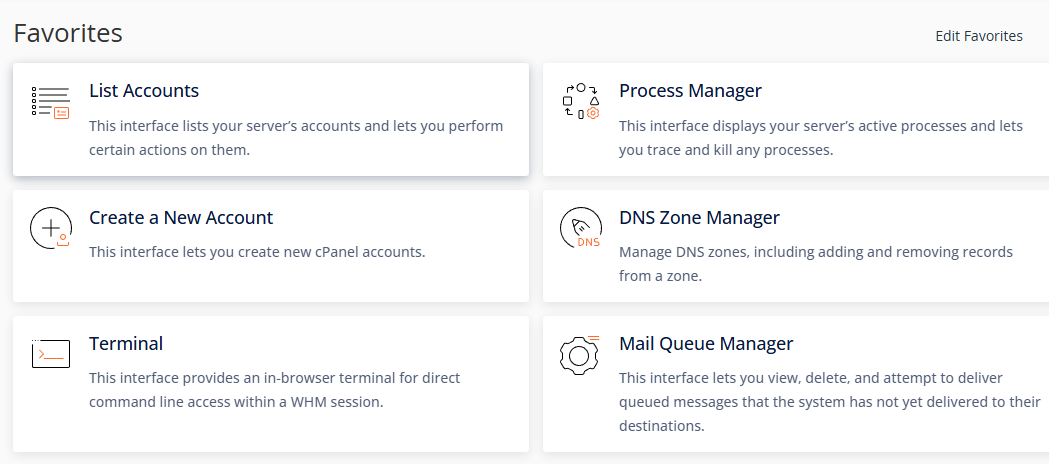
2. From the main WHM dashboard area you can access the create account tool either via the search bar or via the favourites menu as shown.
3. After entering the create account tool, enter the primary domain for the account. This will automatically create the username for the account at the same time.
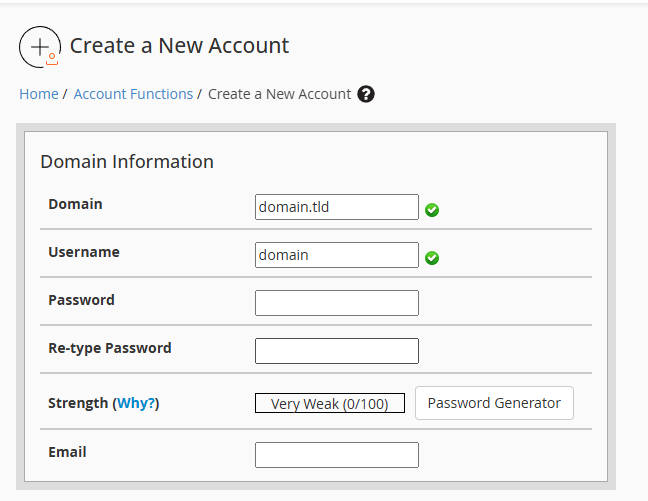
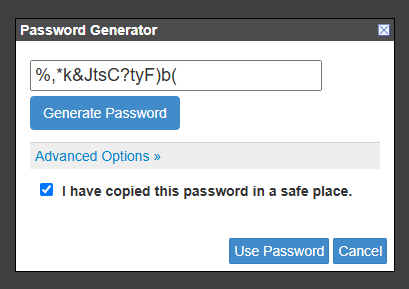
4. Now it’s time to enter or generate a password using the generator tool. If generating a password make sure to copy and save it to safe place.
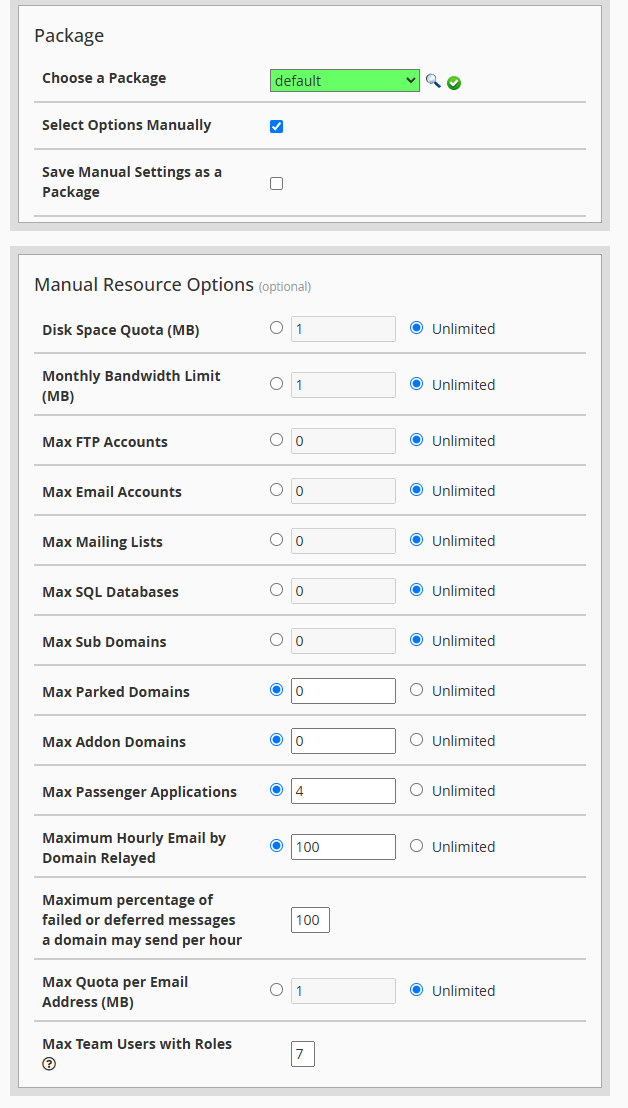
5. At this point you can choose a package for your account or select those options manually using the checkbox. This will dictate the limits for the account including disk space, addons domains and more.
6. Afterwards, if you want to choose a different language, use the locale dropdown to select one.

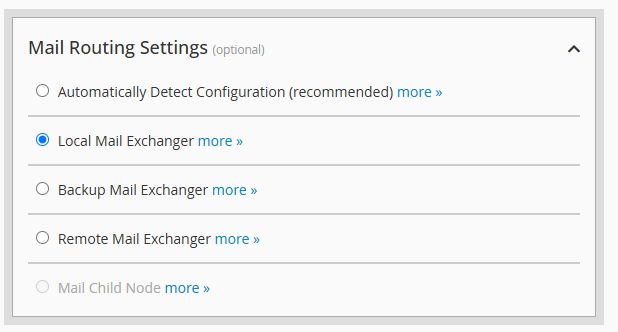
7. Continuing on you configure mail routing settings for the account, this is key if you are using external mail services that might otherwise conflict with the account.
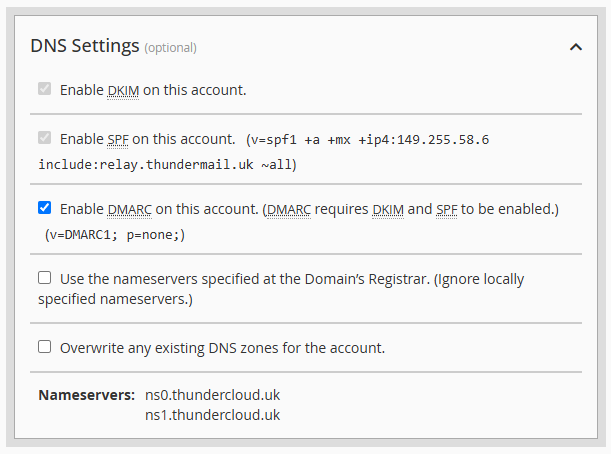
8. Similarly, at this stage you can configure DNS settings for the account. This might be useful if you’re using an external DNS such as Cloudflare.
9. Finally, after checking through those settings a final time create the account using the blue create button.
