
How to install cPanel on a VPS
Installing cPanel on your VPS requires knowledge of the command line and its basic functions. On your VPS, you will have root-level access, which gives you full control.
cPanel (WHM) is one of the most popular web hosting control panels, and for good reason. Resellers can create resource allocation packages, suspend users who miss payment deadlines, and much more. cPanel allows users to manage email, domains, security, and other essential features. If you’re looking for a more managed solution, you may want to consider our specific web hosting services.
Prerequisites
Before installing cPanel on your VPS, ensure that you meet the following requirements:
- VPS with Root Access: You need a VPS with root-level access. Without root access, you won’t be able to install or configure cPanel.
- Compatible Operating System: cPanel supports a range of Unix-based operating systems, check that your distribution is supported first, in this guide we will assume you are using AlmaLinux8.
- Resource Requirements: Ensure your VPS meets the resource requirements for cPanel, we recommend at least 1vCPU, 4GB RAM and 40GB disk.
- SSH Client: You’ll need an SSH client, such as PuTTY, to access your VPS and run installation commands. Download PuTTY here.
How to Install cPanel using PuTTY
This guide uses cURL to download and install cPanel. Learn how to use cURL.
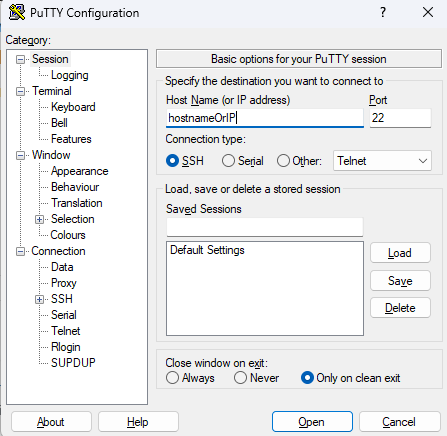
1. Open PuTTY and enter the IP or Domain address, selecting SSH as the connection type.
2. Enter your VPS username, When prompted either copy & paste or type the password for your VPS.
3. Head over to the official cPanel installation guide and, enter the command from the guide into PuTTY it will look similar to the command below:
cd /home && curl -o latest -L https://securedownloads.cpanel.net/latest && sh latest4. Allow some time for the cPanel installer to run.
5. Enter your VPS’ IP/Domain information into your browser’s address bar, with either :2087 or /WHM at the end.