
How to edit the hosts file in Windows, macOS or Linux
Have you ever wanted to make changes on development or staging site without needing an active domain? Editing the hosts file can help and is quite simple to apply across different operating systems.
What is the hosts file?
The hosts file is a system configuration file that maps domain names to IP addresses. It was the precursor to DNS and works in a similar way but with the “host entry” being stored and used locally. Whereas DNS records can be queried via nameservers which are usually externally hosted for redundancy, load balancing and more.
Customisations made in the hosts file will override external DNS records and can be a powerful tool for web page development, troubleshooting and blocking domains from that system entirely by pointing them to a loopback address (0.0.0.0).
Example block
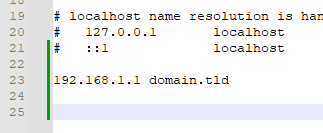
Below is an example of how mapping a working domain with a loopback address blocks an address works.
0.0.0.0 google.com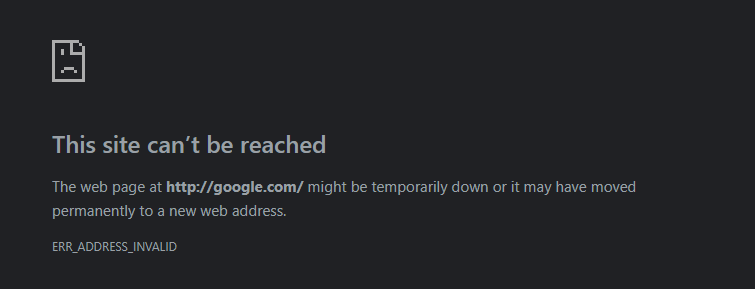
How to get the IP address of your server
In most cases you’ll want to edit the hosts file allow access to a domain that doesn’t currently exist or is configured on another server.
For example when migrating your website to another host before switching DNS you may want to check that it is working correctly, reducing potential downtime – similar to setting up a temporary domain.
Before you can make those changes you’ll need the IP address of your new server. One of the easiest ways to do this is via a hostname to IP resolver. You can also get the IP directly from cPanel or WHM.
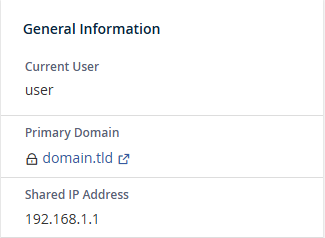
Get your IP from cPanel
After logging into cPanel you can view the shared IP address via the General information pane.
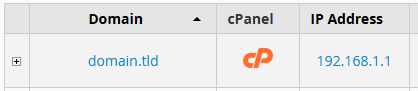
Get IPs from WHM
From the list accounts page you can see the IP address for each cPanel account.
How to edit the hosts file
In this guide learn how to edit your hosts file and apply changes across different operating systems.
Editing the hosts file in Windows
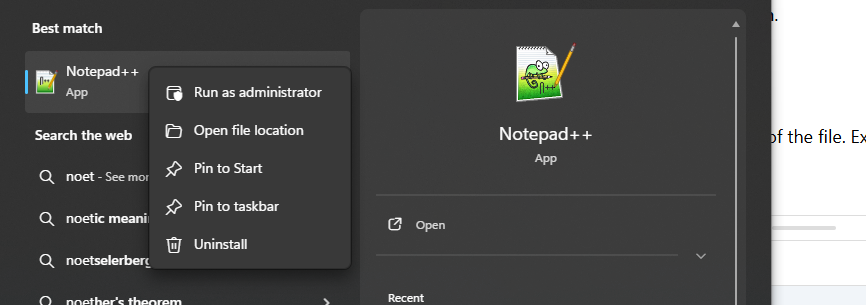
1. From your Windows device, open the start menu and search for notepad, then using a right click run as an administrator.
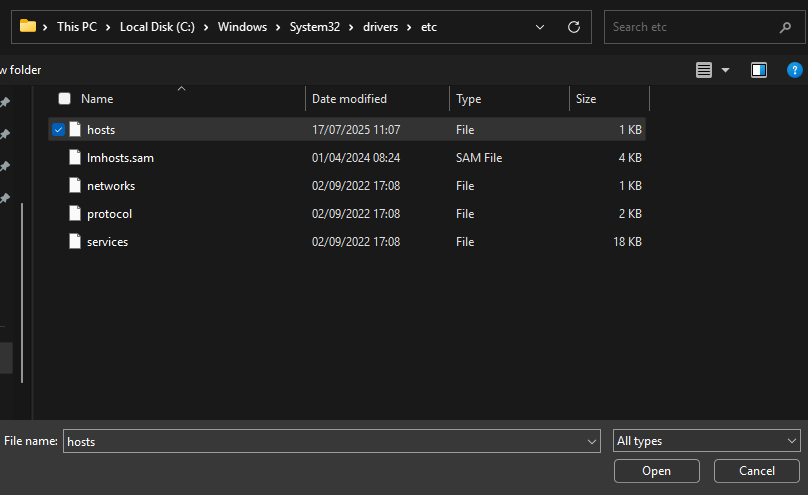
2. With notepad opened as administrator, click the folder icon and enter the following file path into the address bar.
C:\Windows\System32\Drivers\etc
3. Now, from the etc folder click hosts to top open the hosts file.
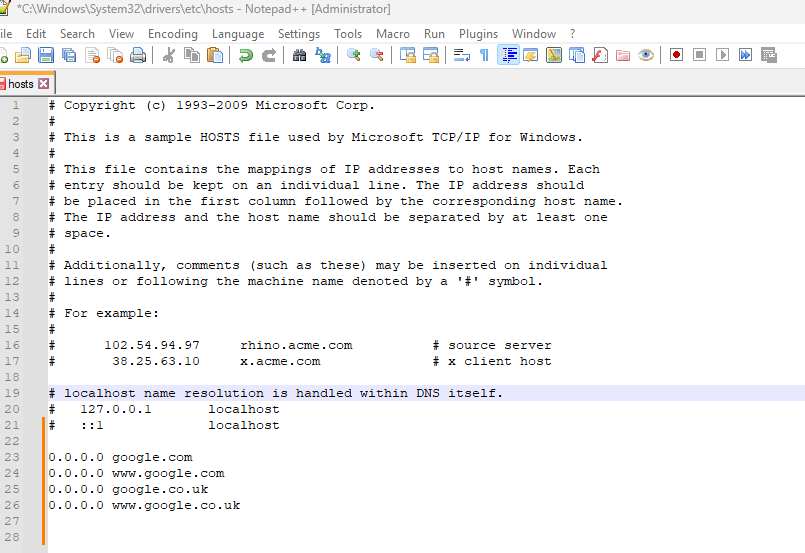
4. With the hosts file open, add specific host entries relating to your site. In the example below we’ve mapped a non existing domain to our hosting.
6. After you’ve made your changes use the file save, or the keybind CTRL+S to save your hosts file changes.
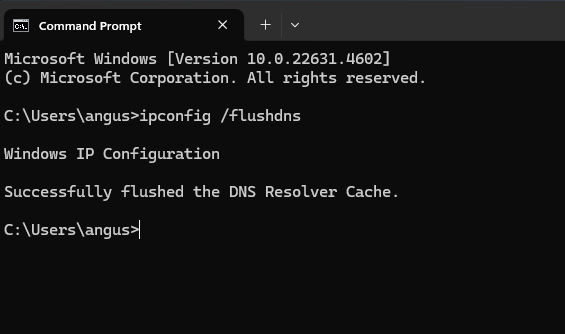
7. Finally, flush the DNS cache on your device by opening a command prompt window and running ipconfig /flushdns. Below is an example output of that command.
Editing Hosts in macOS
Using macOS you can edit your hosts file directly from the terminal or using finder.
Edit with Terminal
1. Start off by opening spotlight search with Command ⌘ + Space, then type in Terminal and click on it.
2. At this stage you can use your text editor of choice, we are using nano. Run the following command to open /etc/hosts with nano. If prompted enter your admin password.
sudo nano /etc/hosts3. Then add the IP address and domain name at the bottom of the file.
4. Save the changes by pressing Ctrl + X, then Y, and Enter.
5. Flush the devices DNS cache with the following command
sudo killall -HUP mDNSResponderEditing with Finder
1. First open Finder and click Go, Go to Folder from the top menu.
2. From here enter /etc and find the hosts file.
3. Open the hosts file with the text editor to make changes to the host entries or add new ones.
4. Afterward to save your changes you can use File, Save or the key bind Command ⌘ + S.
5. Finally, open a terminal window and flush your DNS cache with the same command as above.
sudo killall -HUP mDNSResponderEditing the hosts file on Linux
Editing the hosts file on Linux is virtually the same as using the terminal on macOS.
1. To start, open a terminal window you can do this by clicking on the terminal app or using the key bind CTRL + ALT + T.
2. Now with your terminal window open using your preferred text editor (we’ll use nano) enter the following command to enter the hosts file.
sudo nano /etc/hosts3. Moving on with the hosts file open add or edit your host entries to apply your changes then save those by using the key bind CTRL + X followed by Y and Enter.
4. Finally you need to restart the network service on your device which varies depending on your distribution and whether you are using systemd. For most the command will be as follows.
sudo systemctl restart network-manager