
How to fix a WordPress contact form not sending emails
If your WordPress contact form isn’t sending emails, you’re not alone. Many users experience issues where WPForms, Contact Form 7, Elementor Forms, and other plugins fail to send notifications. This is usually due to misconfigured email settings, server restrictions, or missing SMTP authentication. In this guide, we’ll show you how to troubleshoot and fix WordPress contact form email issues, ensuring your messages are delivered reliably.
Install & Activate the plugin
1. Firstly, log in to your WordPress admin area.
2. After logging in, navigate to the add plugins section.
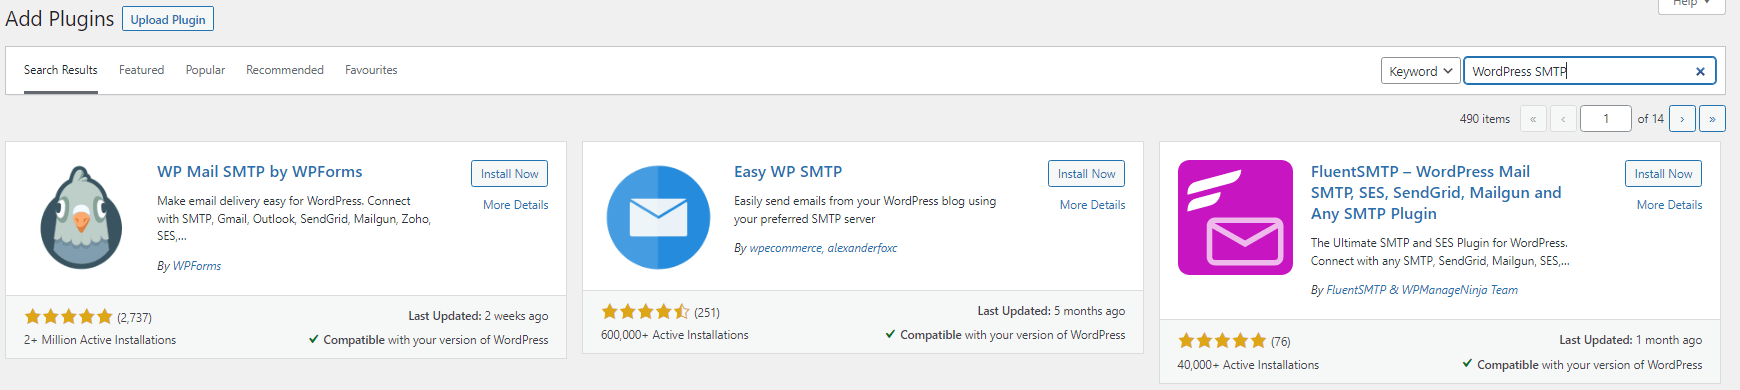
3. Now, using the search feature, enter “WordPress SMTP” into the search box. Click Install Now to install the plugin.
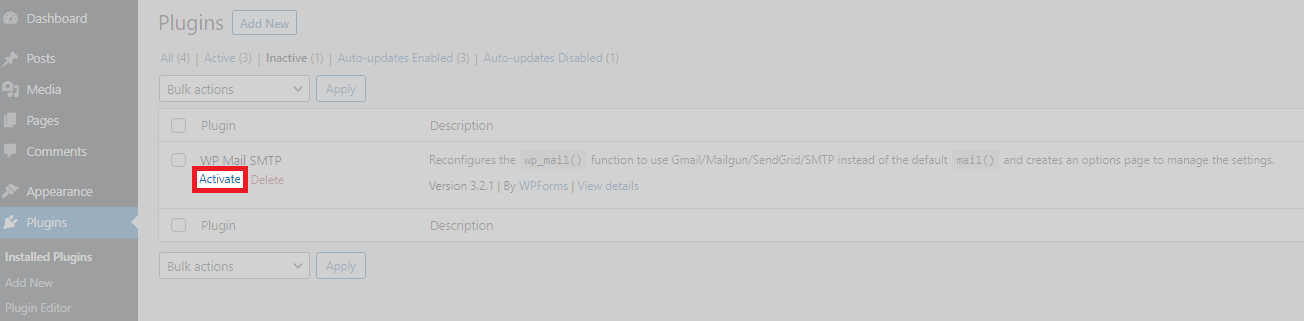
3. Afterwards, activate the plugin. To do this, click Plugins under WP Mail SMTP then, click Activate as shown below.
Install & Activate the plugin
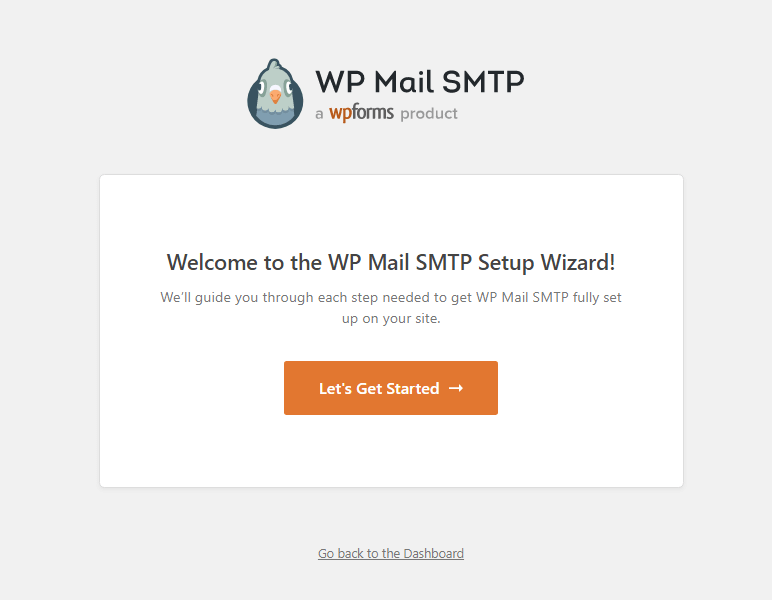
1. First, to start the wizard, click Let’s Get Started.
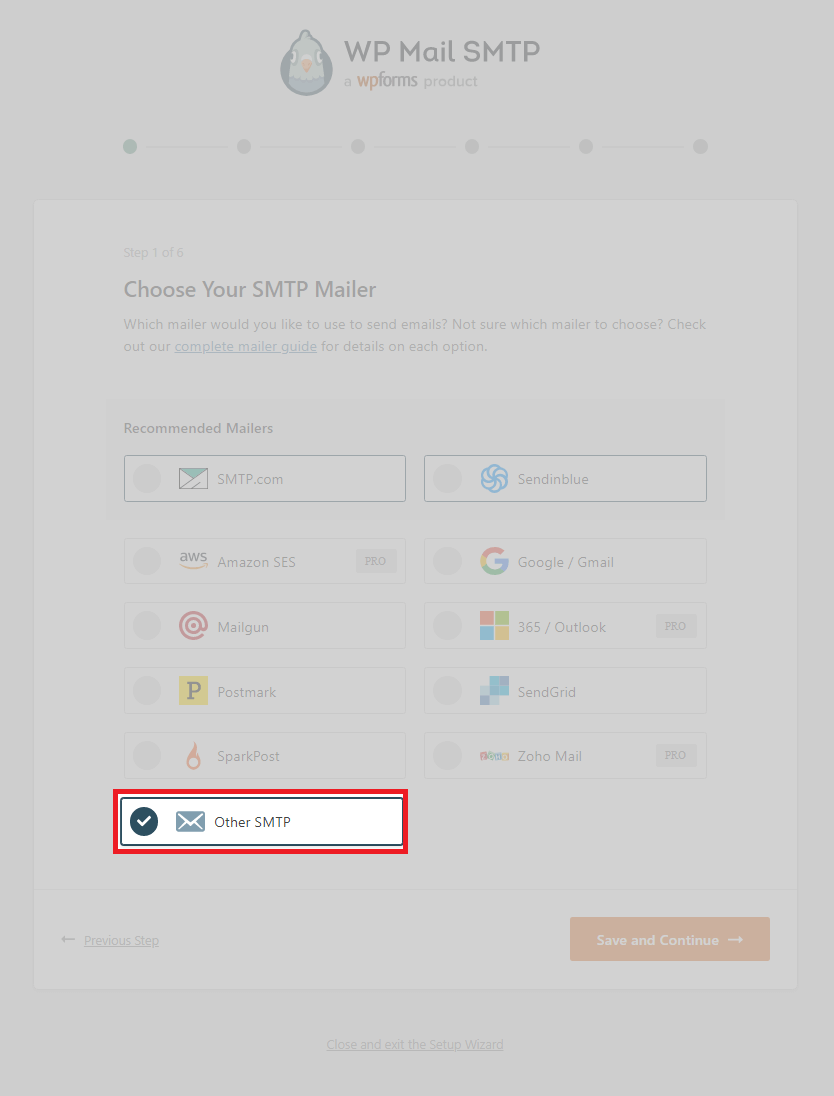
2. Now, on the Choose Your SMTP Mailer page, select Other SMTP. Then click Save and Continue.
3. Afterwards, enter your SMTP hostname. You can use your own domain address, for instance, yourdomain.tld, you need to install an SSL/TLS certificate on the mail service to send securely. cPanel will install this with AutoSSL.

4. To use the secured version, first ensure your mail service for your domain name is secured by an SSL/TLS certificate. Change the port to 587 this is the secure port for SMTP connections and click TLS under Encryption.
5. Our shared platform requires authenticated SMTP connections. Click Enable authentication
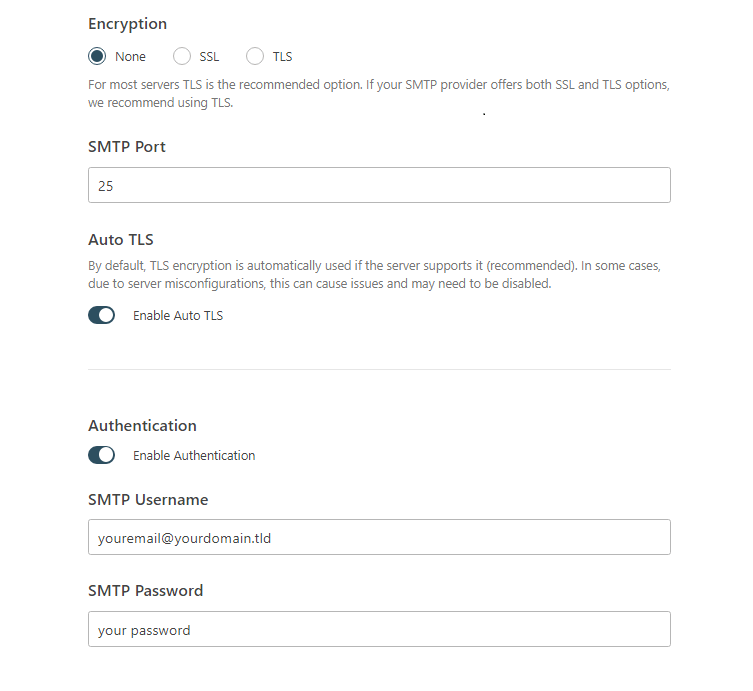
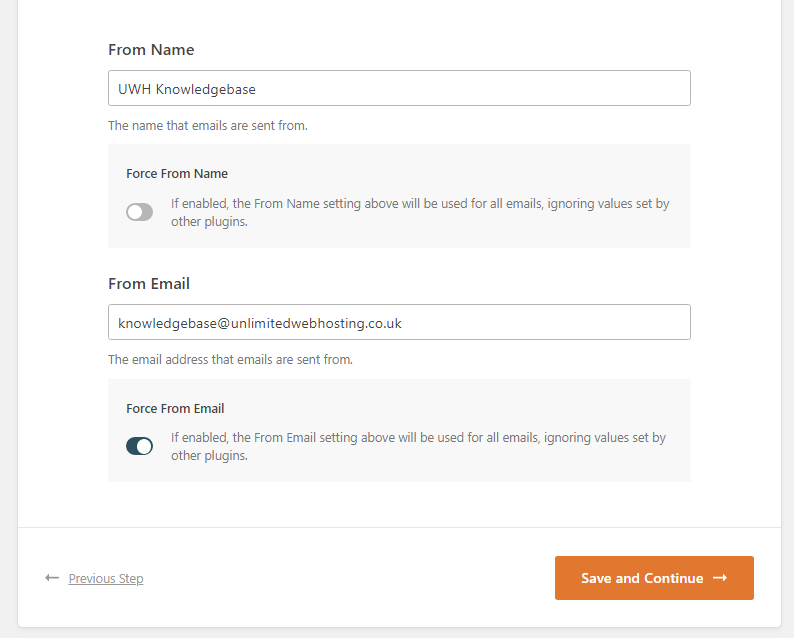
6. Afterwards, set a from name. What you choose is personal preference. Now, in the from email text box, enter the email address for the contact form and click force from email. Click save and continue to finish set up.
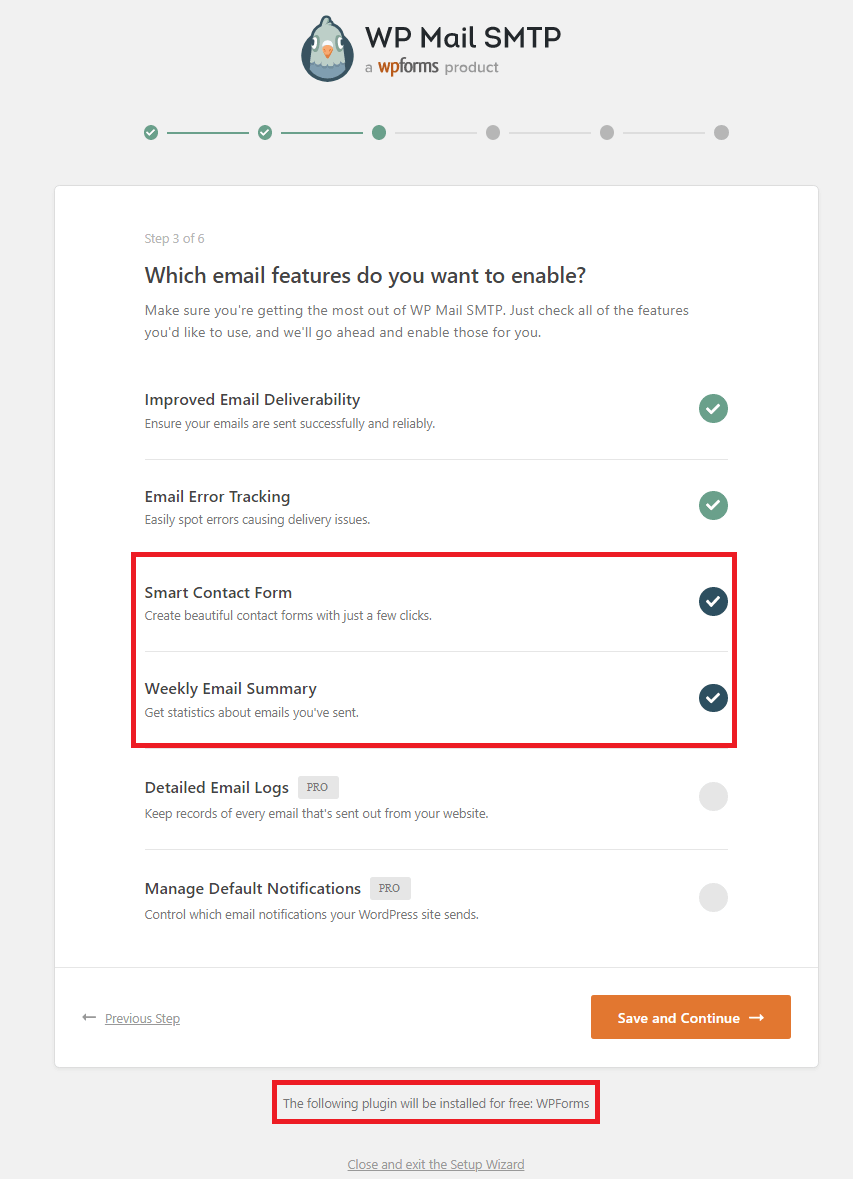
7. The wizard will prompt you to install additional plugins & features. These are optional, uncheck the highlighted circles and check that the footer text has gone. Then click save and continue.
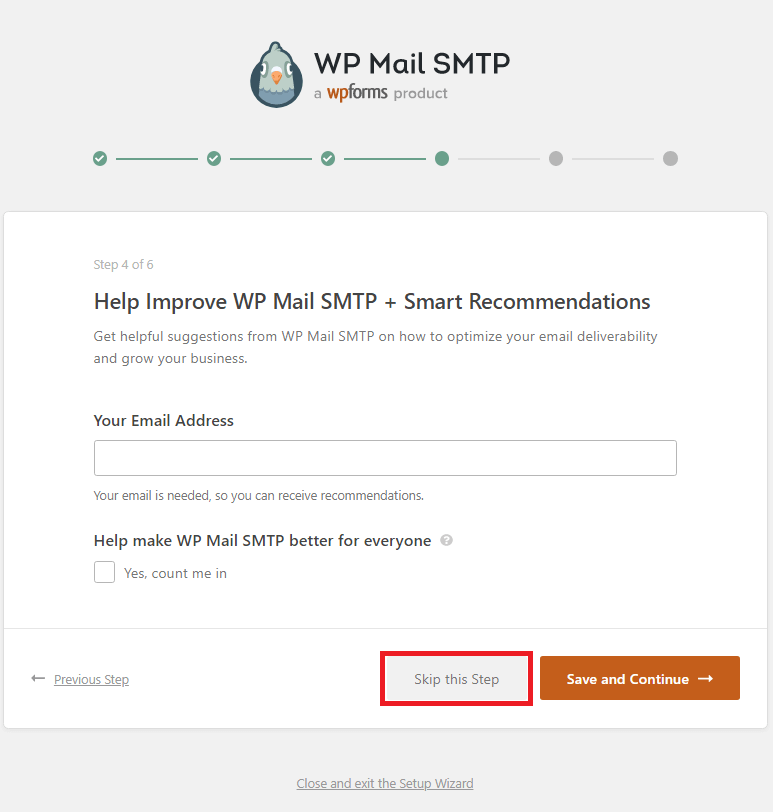
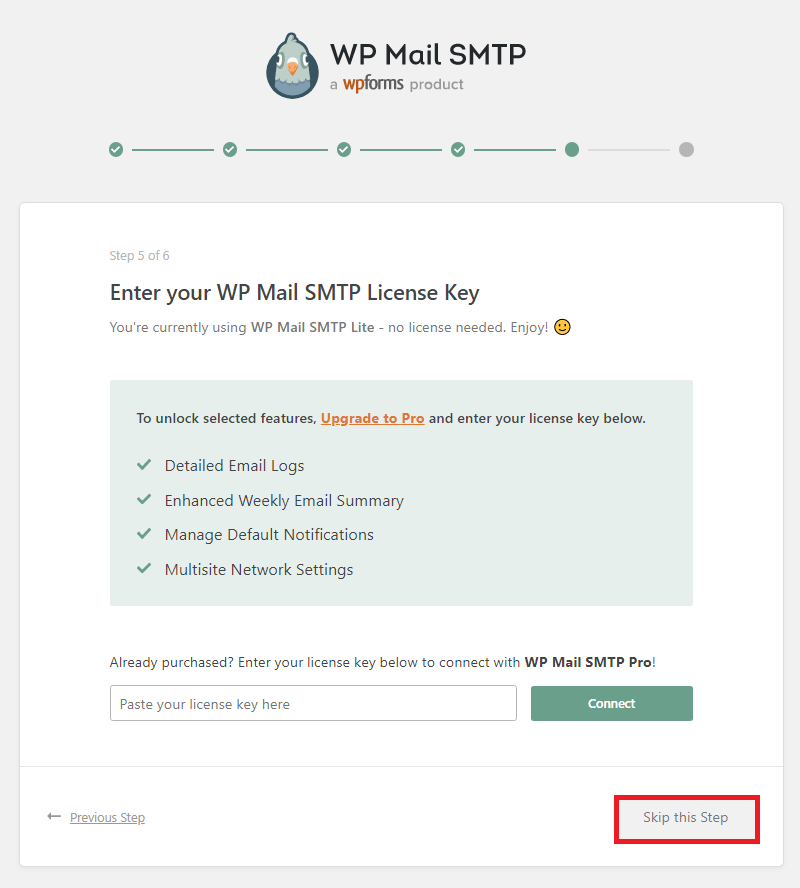
8. We recommend you click Skip this step for both the following steps. But the choice is yours!
9. Finally, the wizard will attempt to send a test email. If it encounters any difficulties, double-check that the details are correct.
WP Mail SMTP manual set up
1. First-off, click Settings under WP Mail SMTP in the WordPress admin area.
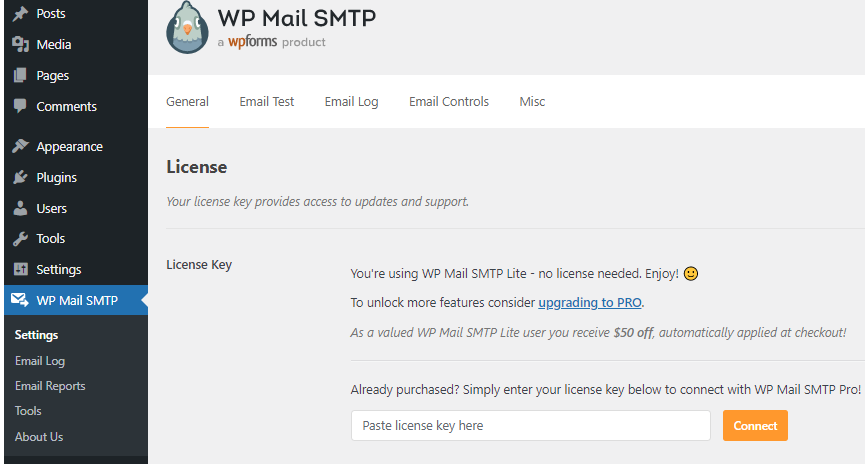
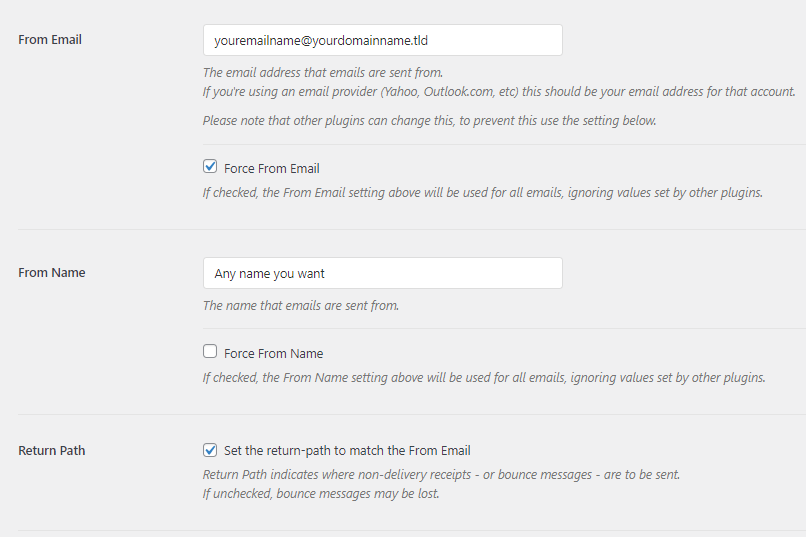
2. Afterwards, enter your from email, enable the force from email checkbox and if you want, click “Set the return-path to match the From Email” to enable return path.
3. To use the secured version, first ensure your mail service for your domain name is secured by an SSL/TLS certificate. Learn how to do this with Plesk
4. Now that it’s secure change the port to 587 and, select TLS under encryption.
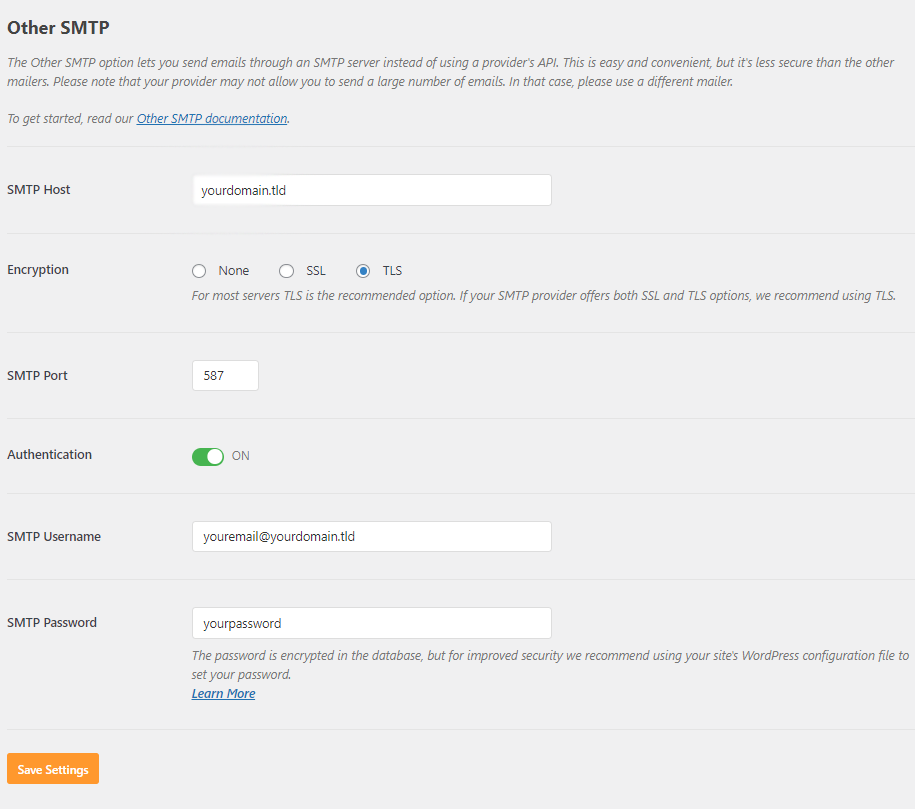
5. Click Save Settings to complete the set-up.