
Restore Websites and more with JetBackup
The latest iteration of JetApps feature-rich backup & restore software that is easy to access straight from your cPanel control panel. JetBackup 5 builds on the existing features and design of JetBackup 4 with a fresh look and easy-to-use interface.
All of our shared hosting customers including cPanel reseller hosting have access to JetBackup. And, can restore backups across several different restore periods.
Whilst we offer an up to 14-day retention period. You must retain and keep your own backups, to ensure full backup availability.
There are a few options when it comes to restoring with JetBackup. This includes full account restores, directory backups, databases and more.
Full Account Restore
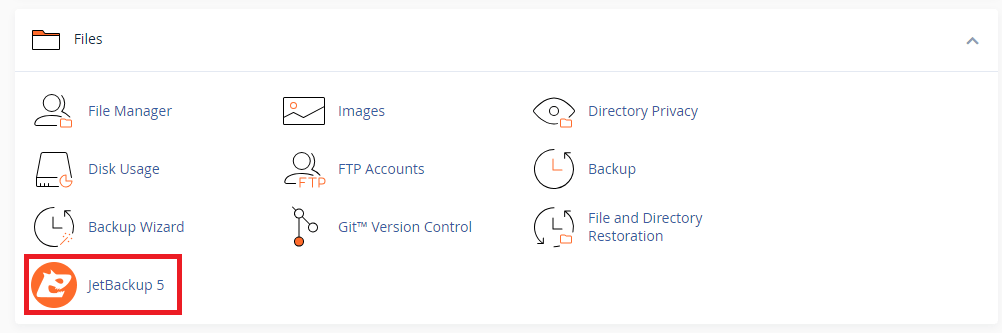
1. First off, from your cPanel control panel, navigate to files and, click JetBackup 5.

2. Moving on, from within JetBackup 5 click on full backups.
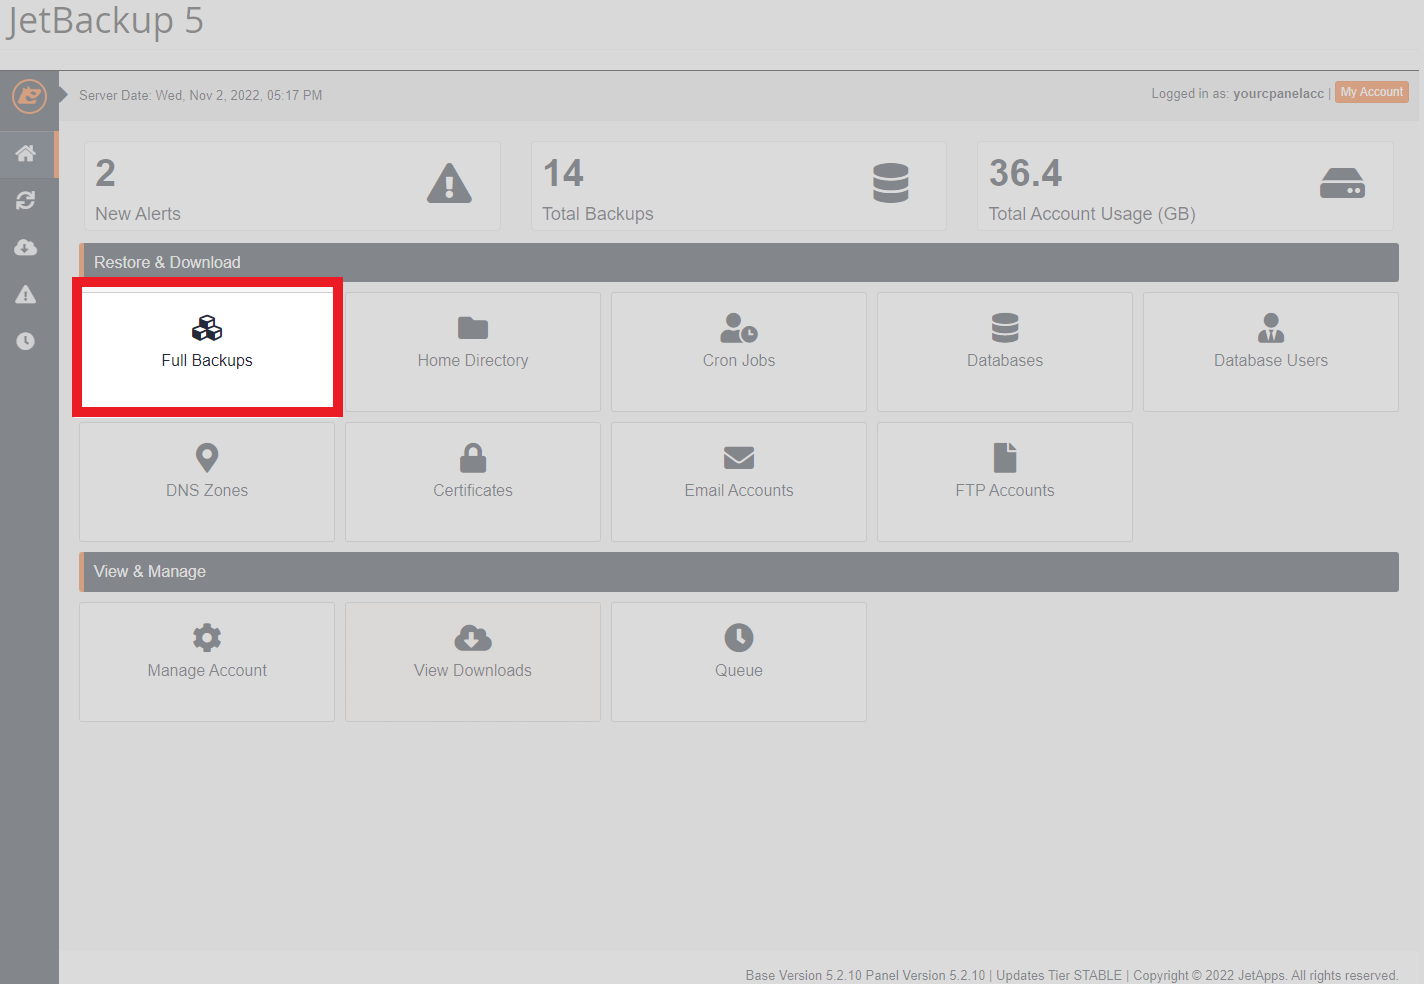
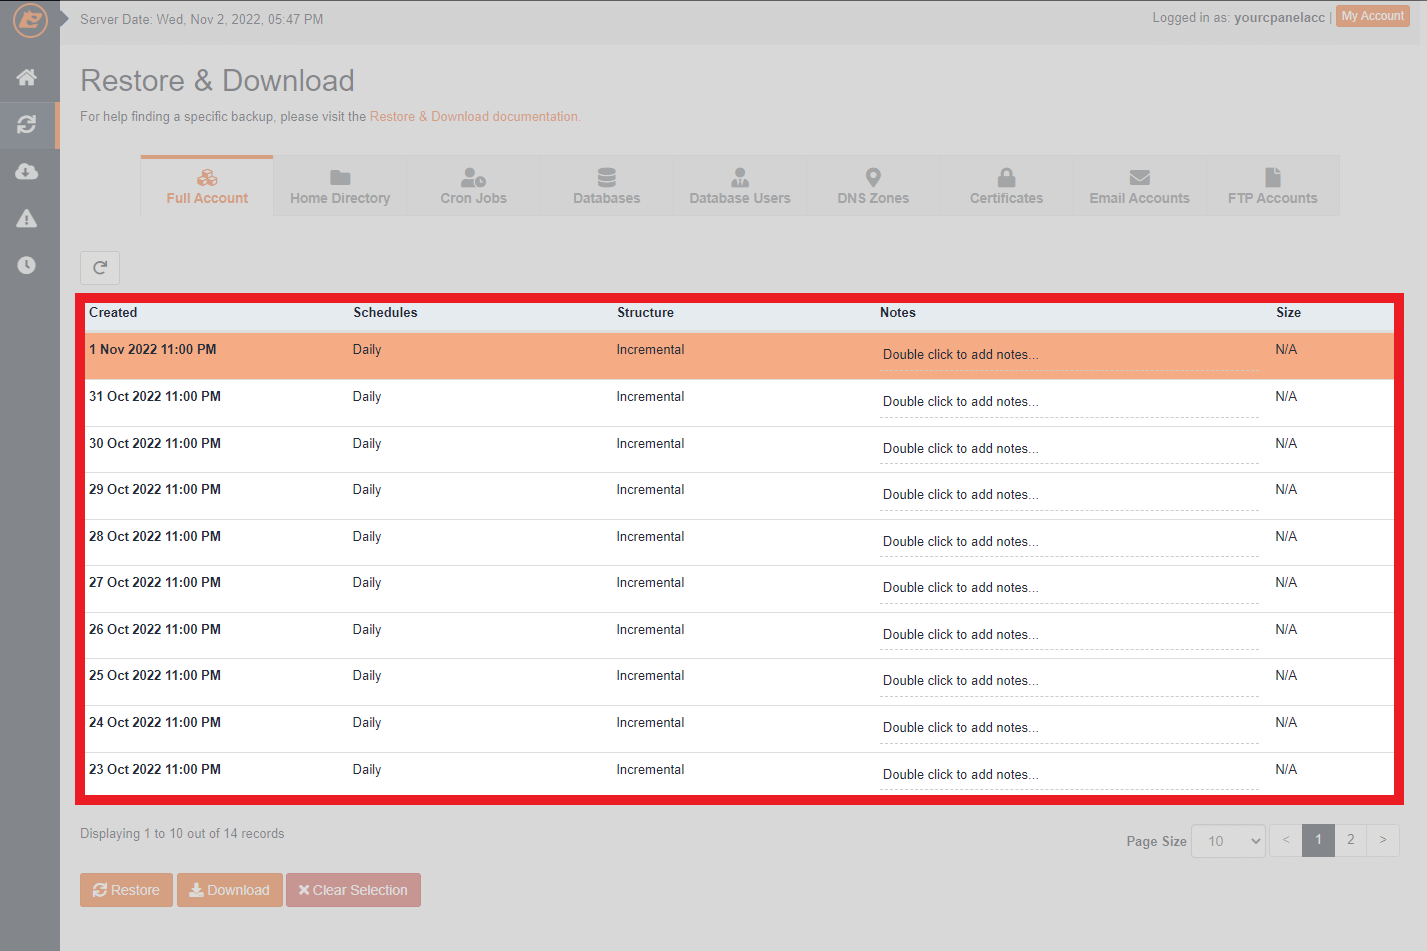
3. The list now shown in the full backups menu includes all available full account backups. Select the date you wish to backup from.
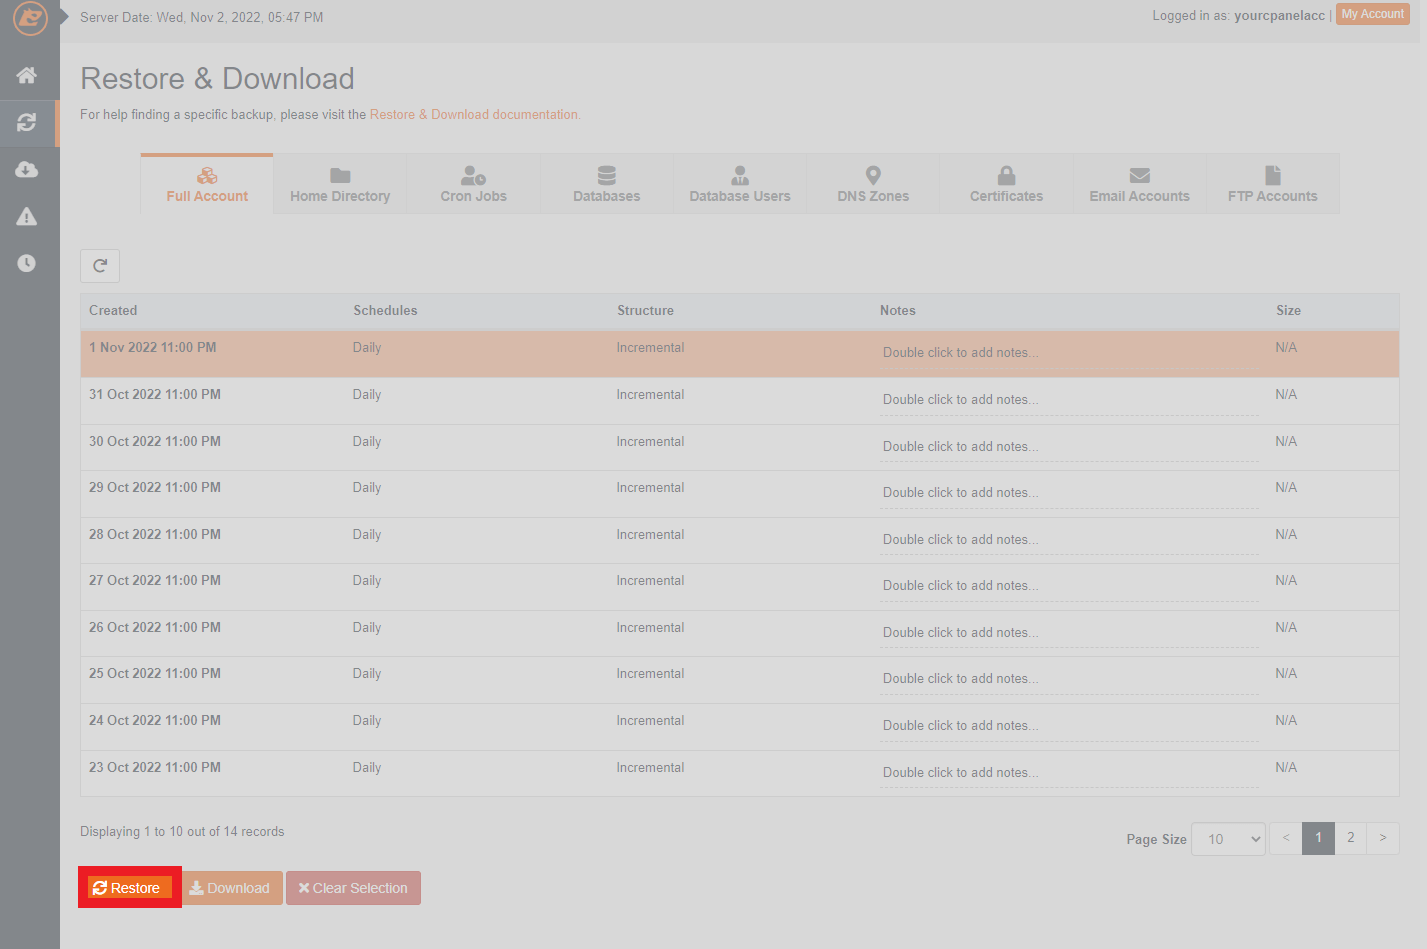
4. Finally, proceed with your selected restore, by clicking the restore button as shown.
Directory Restore – cPanel
1. First from the cPanel control panel, navigate to files then click JetBackup 5.
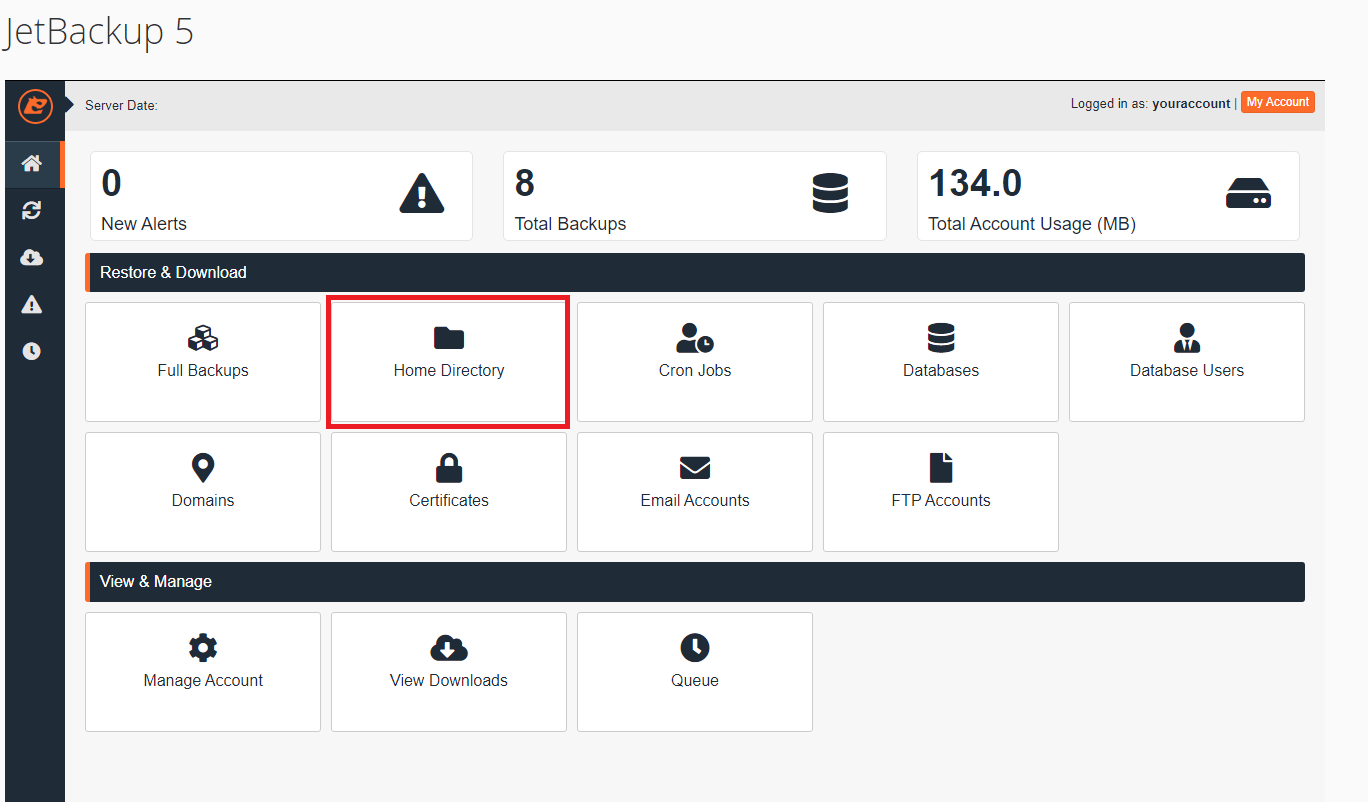
2. From here you can see the full overview of JetBackup 5, click Home Directory to enter the directory backups list.
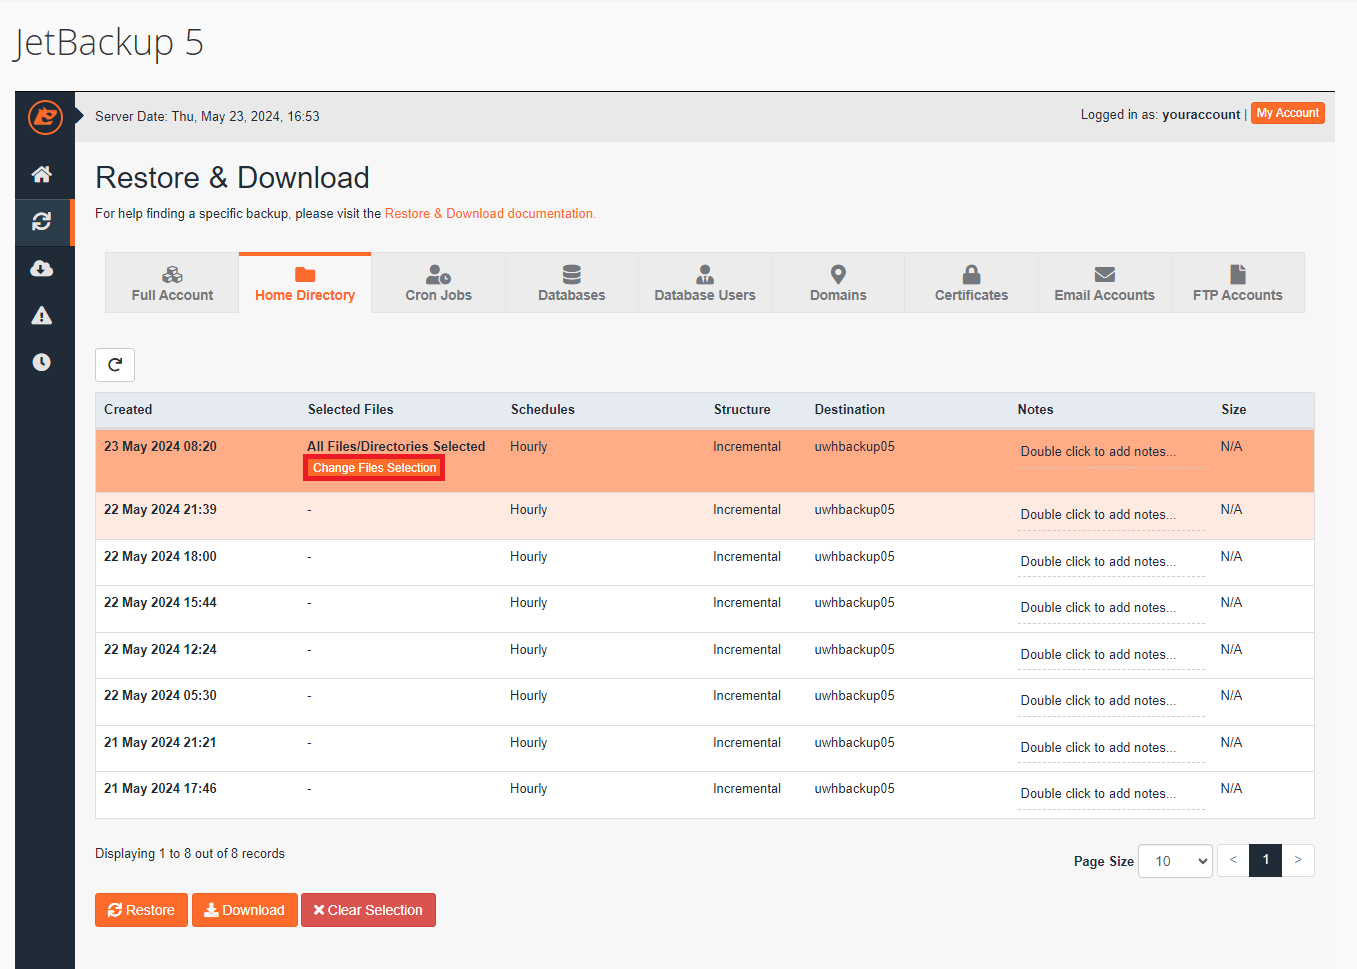
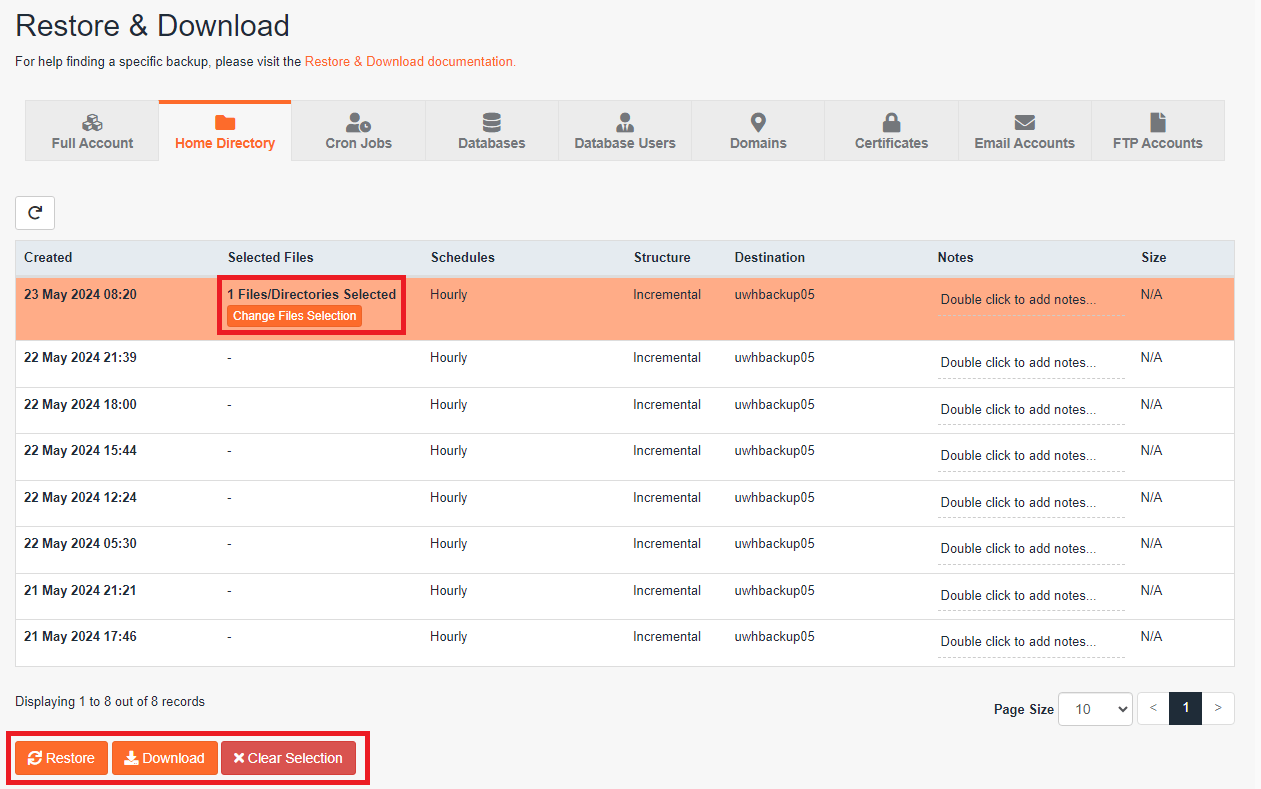
3. Moving on, you can see all the backups available for restore or download. When a backup is selected the background will become highlighted as shown, presenting the options.

4. [OPTIONAL – Change file selection] You can choose specific files or folders to restore to do this Click Change files selection as shown. The files will be from the date the backup was created.
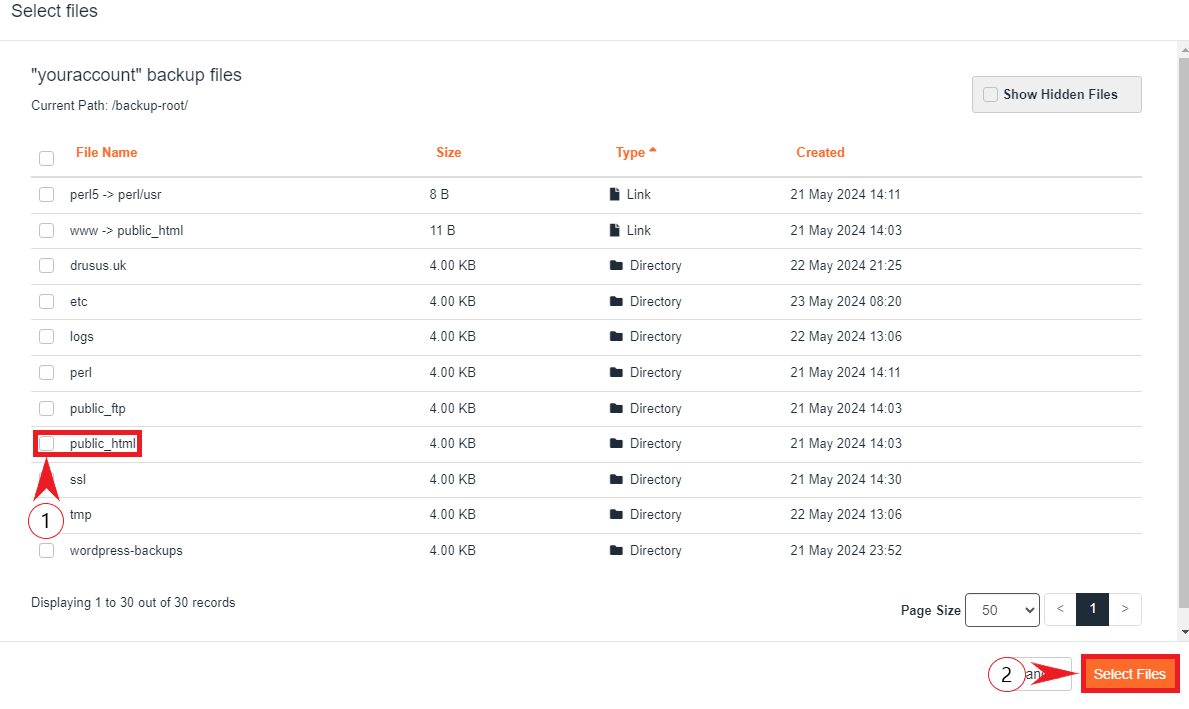
4.1. Now you choose the files you want to restore by clicking the checkbox and then clicking select files.
5. In the images below you can see options highlighted. Clicking on Restore adds it to the restore queue. Similarly, download will prepare the selected files for download via the queue. The clear selection option will remove all selections ready for a new input.
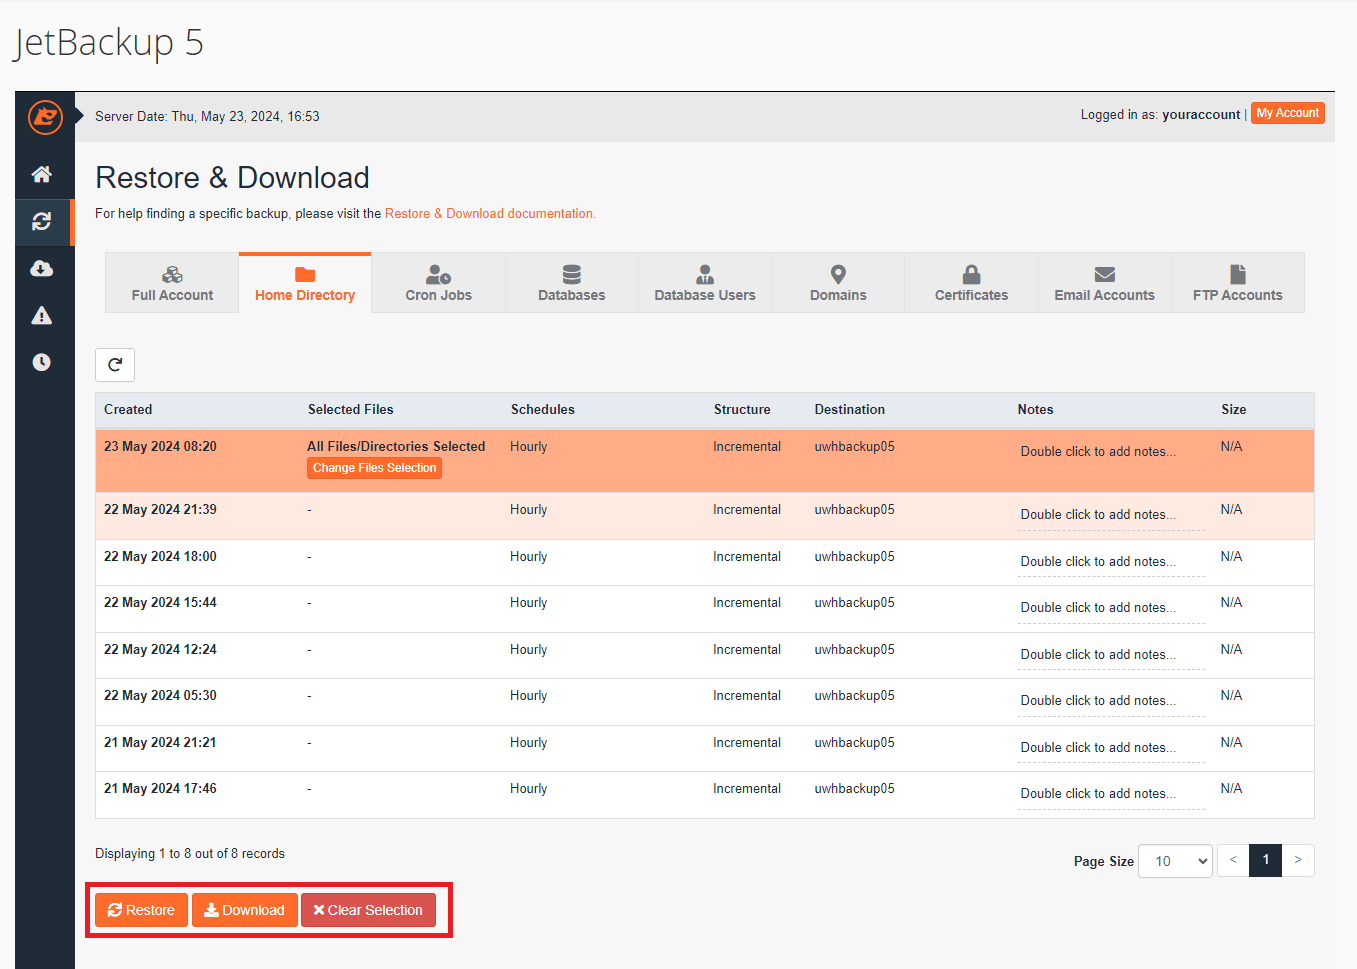
5.1. [OPTIONAL – Specific Restore] Similar to the above page this shows the restore and download options for your selected directories.
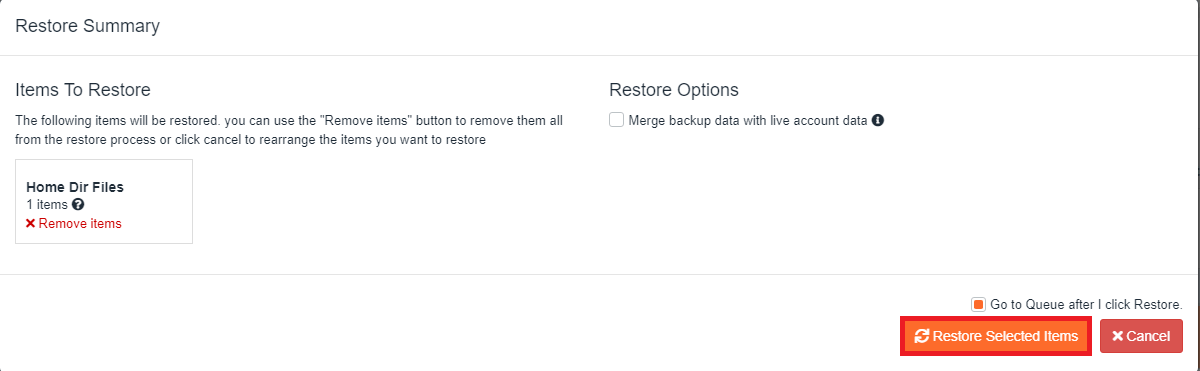
6. After clicking restore you will see the following window outlining what items are to be restored and allowing you to remove items before clicking restore selected items to continue.
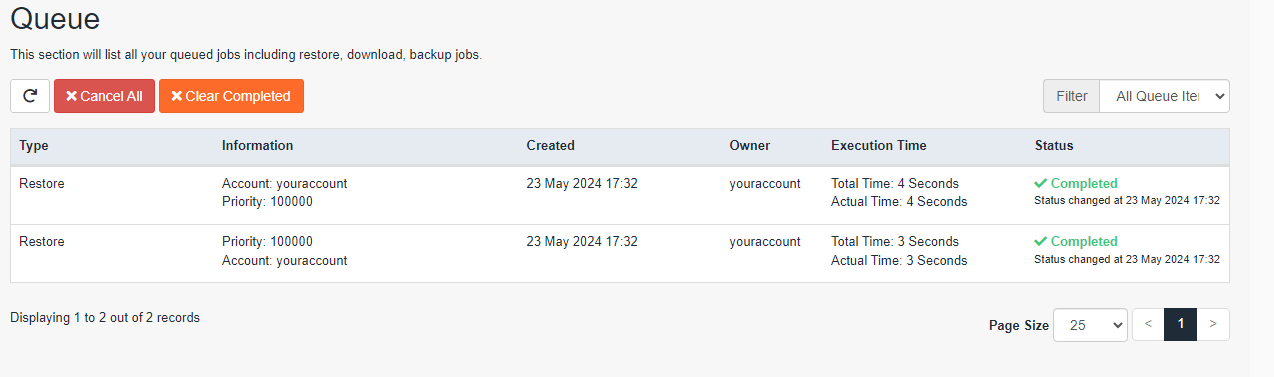
7. Finally you will be directed to the queue page showing you the status of your restore.
Database Restore – cPanel
1. First up from your cPanel in the files section click JetBackup 5.
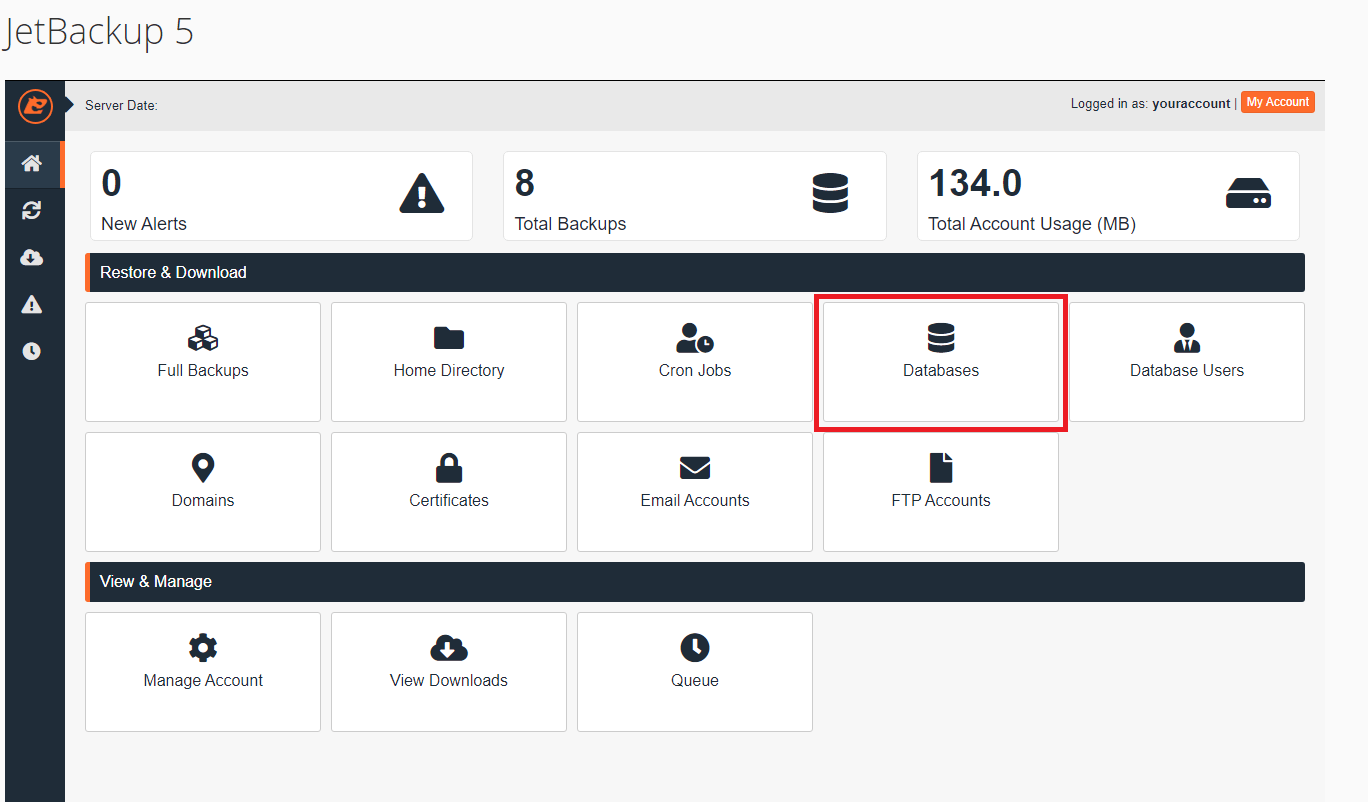
2. This is the home page of JetBackup 5 showing all the different options and controls. Click on databases to continue.
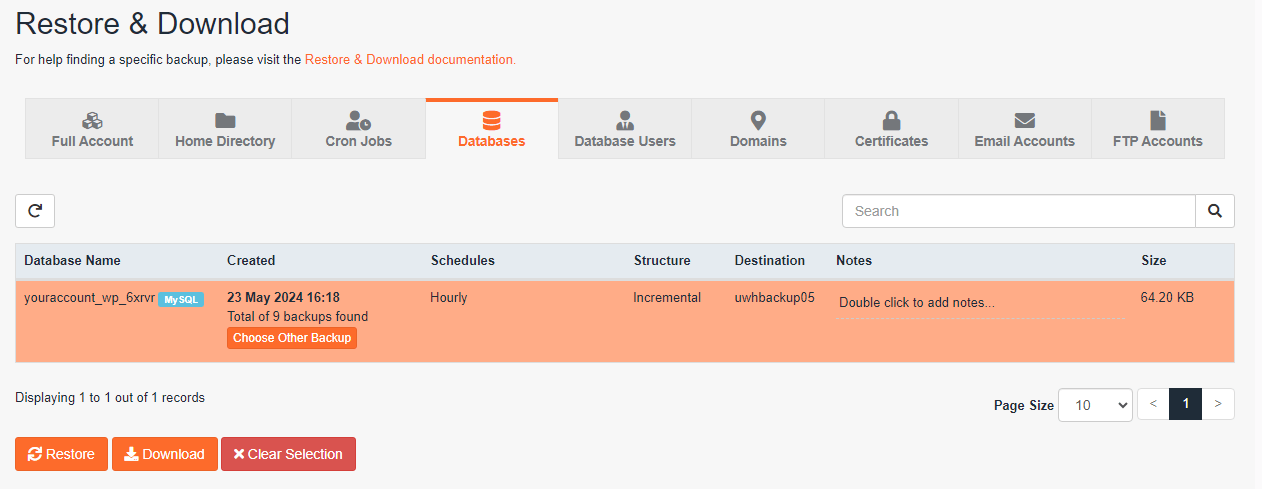
3. From here, you can see all the database backups available for restore or download. After selecting a database backup it will become highlighted as shown, presenting the options below it.
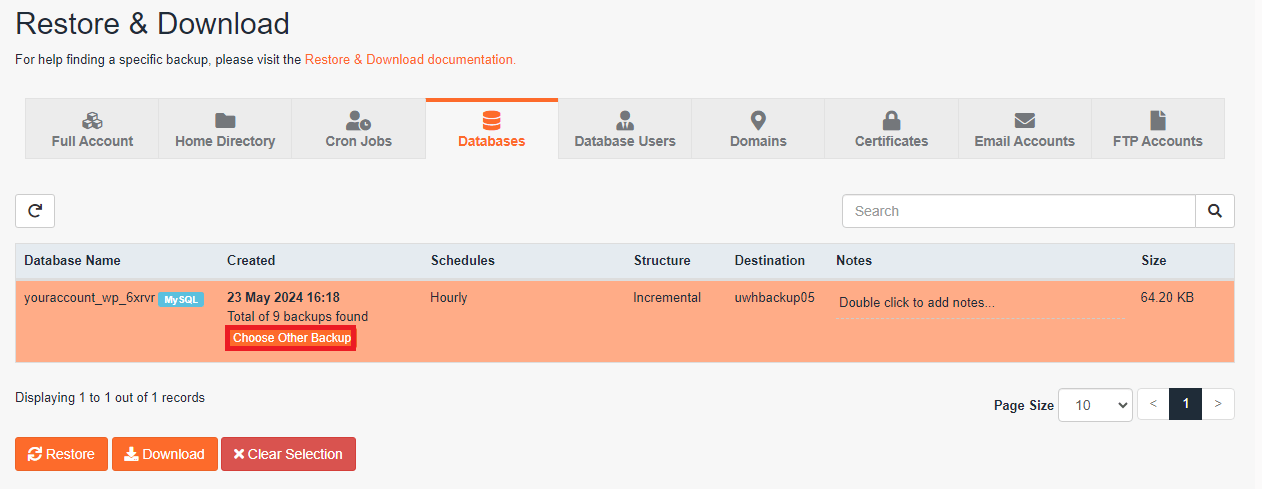
4. If you need to change the date of the selected backup you can click Choose Other Backup and it will present a drop-down window of those available to you.
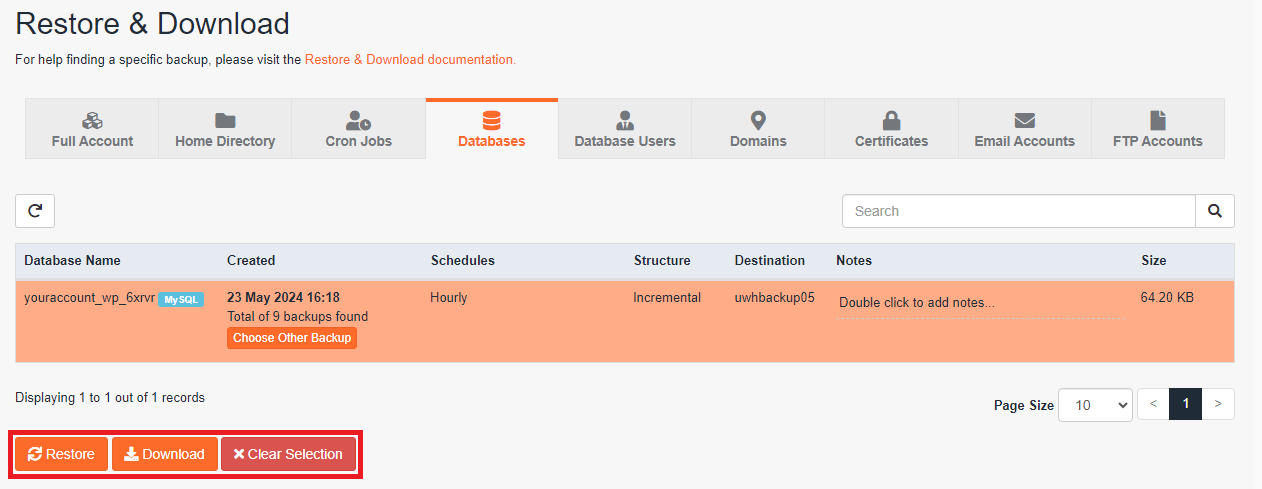
5. Once you have the correct backup selected you can choose what you want to do with it, including restoring it or downloading it to your device.
6. The process from here is similar to that for a specific directory backup showing the restore summary page and a confirmation prompt.