
Add a custom domain mail to Gmail
Gmail, is one of the most popular email management platforms. Partly because you can link and manage an existing email address in Gmail. This works similarly to applications such as Microsoft Outlook & Mozilla Thunderbird to name a few.
This can be very powerful if used correctly. For instance, adding an email account to Gmail enables access to some of Gmail’s features, including:
- Multiplatform Support – A web-based app, an iOS app, and an Android app.
- In-built email forwarding support.
- A search feature that is both quick and reliable.
- Support for multiple mailboxes or email accounts.
- Ability to move and manage mail in the user-friendly Gmail interface (Filtering, Tagging Mail)
Before you can add an email to Gmail, create an email using your custom domain. Afterwards, start reaping the benefits of using your custom domain email in Gmail.
Add your email to Gmail
Before you can add your email to your Gmail account, you will need to create an email. Throughout this guide, images used to highlight relevant areas can aid with the set-up process.
Gmail settings configuration
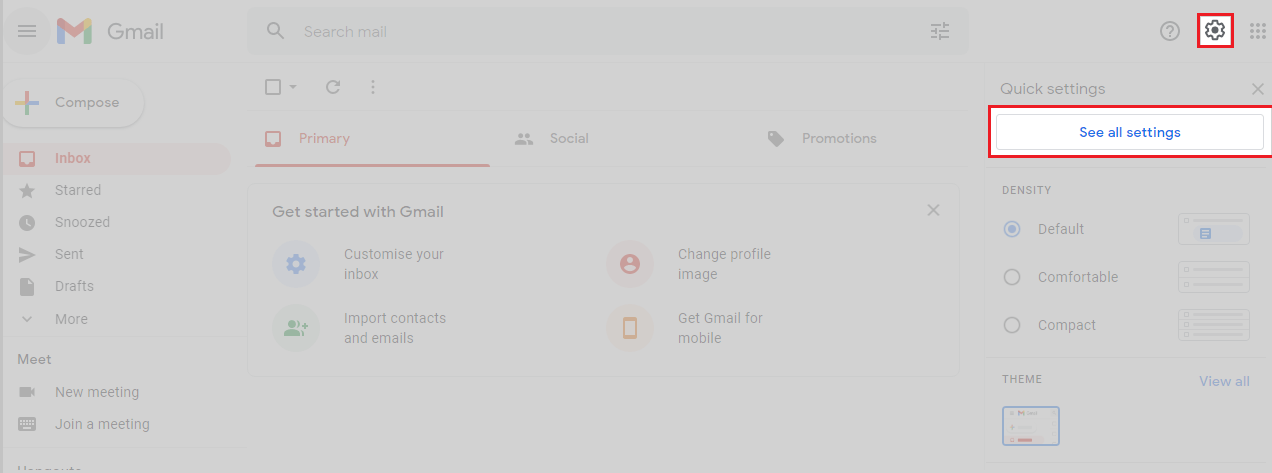
1. Firstly, log in to your Gmail account and click the settings cog.
2. From here, under Quick Settings, click See All Settings.
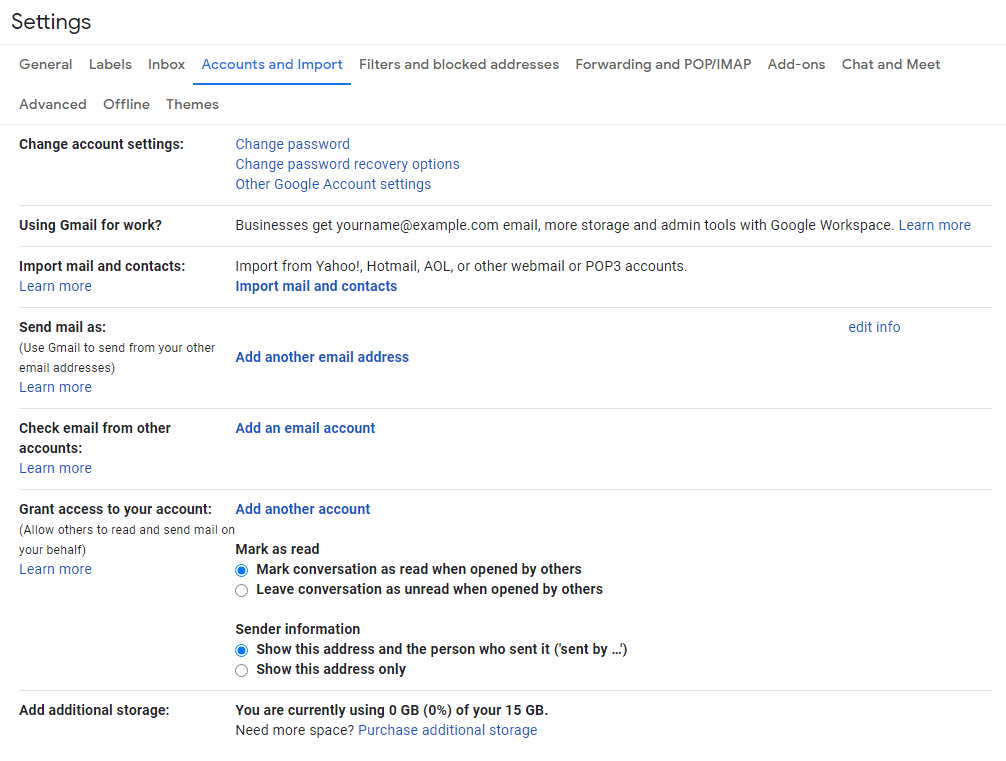
3. Afterwards, in the main Gmail settings area, under Accounts and Import, click Add an email account.
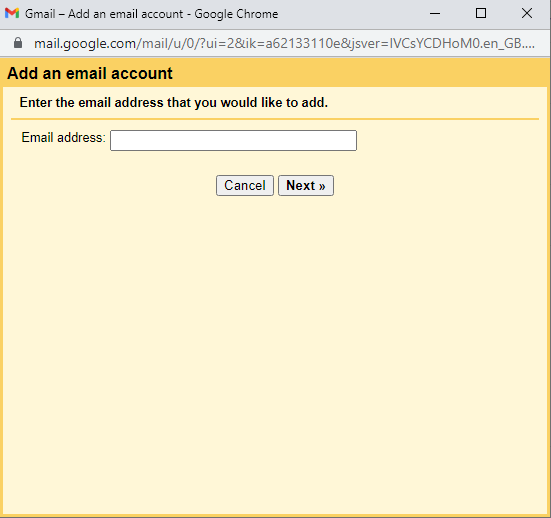
4. Now you’re in the Gmail Add an Account wizard, enter the email address you want to add to your Gmail account. Once that’s done, click Next to proceed.
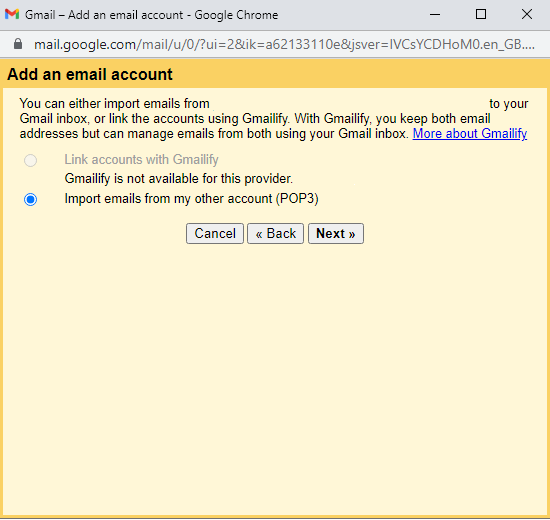
5. Afterwards, you will be presented with a radio button. Gmailify is currently unavailable. Import emails from my other account (POP3) should be selected, click Next.
Adding the email account with POP3 (Incoming)
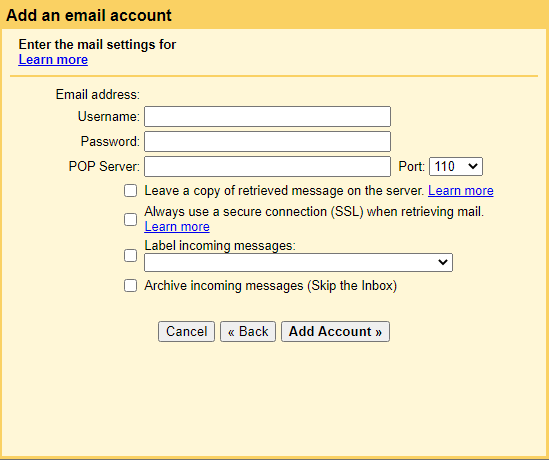
1. In the add an email account window, populate the fields using the mail settings table.
| Username | your full email address – this is the email you have set up already. |
| Password | your password – the password you created for your email address. |
| POP Server | yourdomain.tld – The domain associated with your web hosting package. |
| Port | 110 – Unencrypted (Unsecured) POP3 995 – Encrypted (Secured) POP3 |
2. You can also use your domain. However, for this to work using the secured port, you need to install an SSL certificate covering the domain’s mail service.
3. Once you have entered all the mail settings for the email account, click the Add Account button to proceed.
4. Afterwards, in the window pop-up, select yes & click Next Step. This will proceed with the email account set up using SMTP for outgoing mail control.
Configuring SMTP in Gmail (Outgoing)
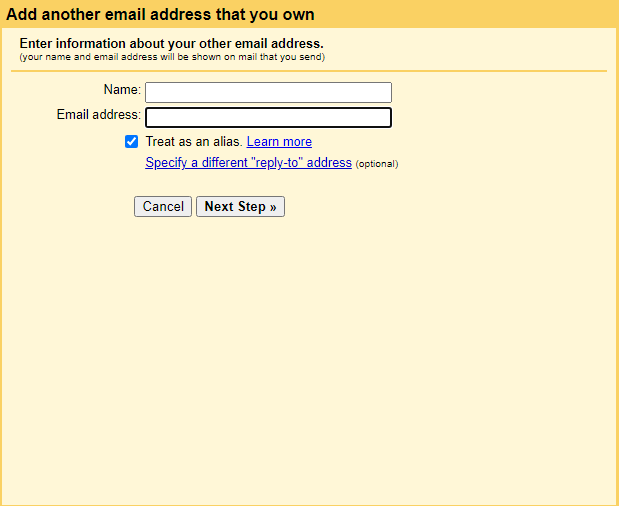
1. Firstly, enter your name or the name you would like associated with the account. For instance, if this address represents a contact form a good name might be: “Contact Form”.
2. Afterwards, in the window pop-up, select yes & click Next Step. This will proceed with the email account set up using SMTP for outgoing mail control.
3. Now, enter the email address you want to add to Gmail.
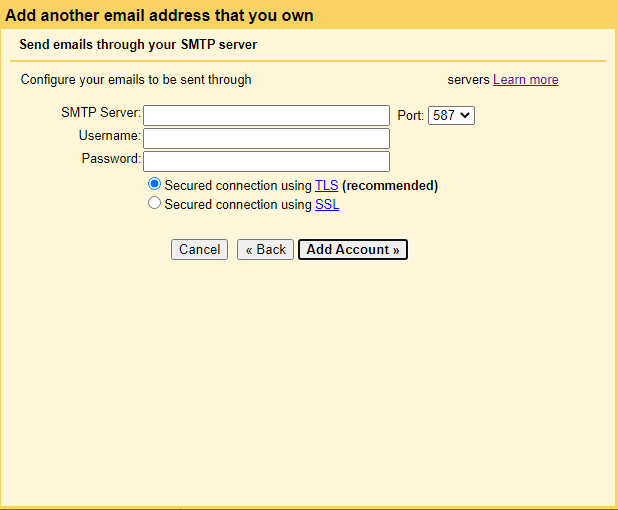
4. Next, in the “Send emails through your SMTP server” window, populate the SMTP configuration fields using the SMTP settings table below.
| SMTP Server | yourdomain.tld – The domain associated with your web hosting package. |
| Username & Password | Your username & password. Both should be exactly the same as your POP3 details. Unless |
| Port | 587 |
| SSL/TLS Check-boxes | Secured connection using TLS |
5. Afterwards, click Add Account. This will finish the SMTP set up wizard and begin verifying your details.
Complete the set up and troubleshoot your custom email
Verify set up
Check your inbox for the verification email, this may take some time to arrive. After it arrives, click on the confirmation link or copy the verification code. Finally, click verify, completing the process.
Congratulations. Gmail is set up to manage your emails, you can access and use your email account across any OS or Device where Gmail is supported including macOS, Linux and Windows.
Troubleshoot – Not loading correctly
Entering the incorrect details is very common during first-time set-up. Unfortunately, usually fixing these details alone won’t solve your issue. This is because of a block on your IP address, caused by multiple failed authentication attempts. Get in touch with our support team, to remove it.
POP3 Server Denied Access.
The dreaded POP3 Server Denied Access error code occurs due to an authentication error. There are a few ways around this issue, including:
- Sign out of all your Google/Gmail accounts currently open on the device.
- Open an in-private or incognito browsing window.
- Log in to your Gmail account. Then attempt adding the POP3 account again.
- Didn’t work? Repeat the first 2 steps, this time enable less secure apps and re-allow access to your Gmail account.
POP3 and its Limitations
POP3 or Post Office Protocol version 3 is an email protocol used to retrieve emails remotely from a hosted mail server; in this case, your hosting package. By internet standards, POP3 is fairly old, the first version being released in 1984, it has undergone 3 different versions since. However, POP3 remains popular due to its compatibility with most mail software natively supporting popular applications such as Microsoft Outlook, Gmail, and Mozilla Thunderbird.
This compatibility comes from the inherent simplicity of POP3, allowing easy configuration, operation, and maintenance of enabled systems. However, POP3 has limitations and these are most apparent when compared to IMAP, which mirrors emails across devices rather than downloading the email for use on one device.