Create a backup [UD]
In a hurry? Skip to the guide
Importance of backing up
WordPress is a powerful website builder featuring both back & front end functionality through a CMS. Many CMS-type website builders exist, but WordPress is, without doubt, the most popular.
Creating a WordPress Backup is an important part of running a WordPress site. Regularly scheduled backups can help you prevent downtime and data loss. This is especially true if you’re operating a business through a WordPress website. It’s critical to keep downtime to a minimum otherwise, it could have serious implications on customer’s satisfaction.
Because of its popularity, WordPress also comes under lots of pressure from bad actors such as hackers, spammers, scammers, etc. To protect WordPress users, the WordPress foundation releases regular updates, patching known security issues.
This is why keeping either scheduled backups or manual backups of your site is important, it provides a safety net in the event your website becomes compromised. Just deploy an existing backup and bring your website back!
Create a WordPress Backup
There are 2 different ways to create a backup.
- Through contacting our support team.
As a hosting company, we take backups seriously, which is why we run automatic daily backups for all of our shared services up to a 14-day period. These backup archives cover both files and databases. It’s important to note that whilst this service exists, you should not rely on it. We (Unlimited Web Hosting) will not be held responsible if a requested backup is not available.
- Manually
WordPress uses a theme and plugins to determine how a site looks and its functionality. The MySQL backed stores the content of the website.
To manually back up a WordPress site, both the WordPress files and WordPress database must be restored. This can be done using an FTP client like Filezilla to download your files. And, the phpMyAdmin tool found within your cPanel or Plesk Control panel to export your database.
Manual WordPress Backup
Stage 1: File Transfer
- To manually back up your WordPress site you will first need your FTP access details. If you don’t know your FTP details you can get them from your welcome email.
- You can use these details to establish an FTP connection to the server letting you download the website contents.

- Create a folder on your desktop. This will be used to store the backup files. By storing the backup locally, you’re operating within our general terms.
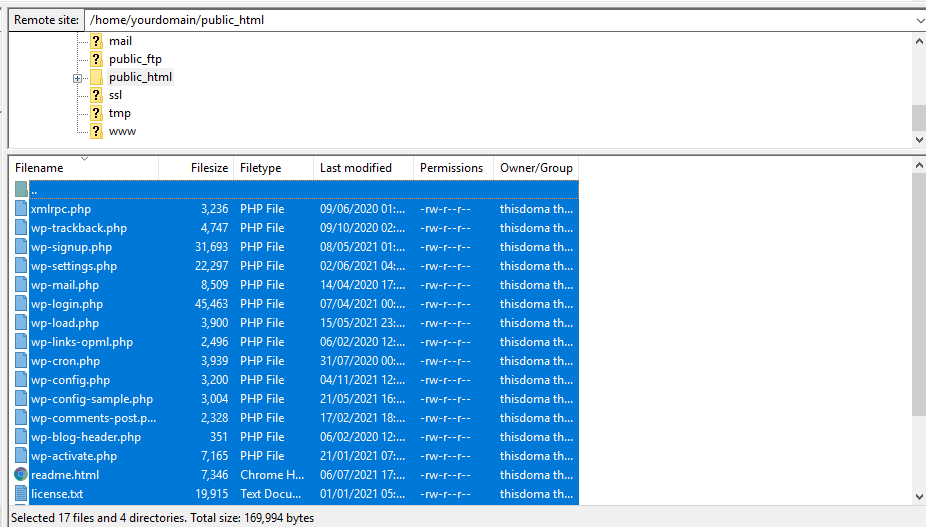
- After you have established an FTP connection, select all the files within the directory of your site.
If you have a multi-site cPanel, ensure you have the correct directory (default is public_html). - After selecting all the relevant files, drag them into the folder on your desktop. This may take a while, depending on the size of your site.
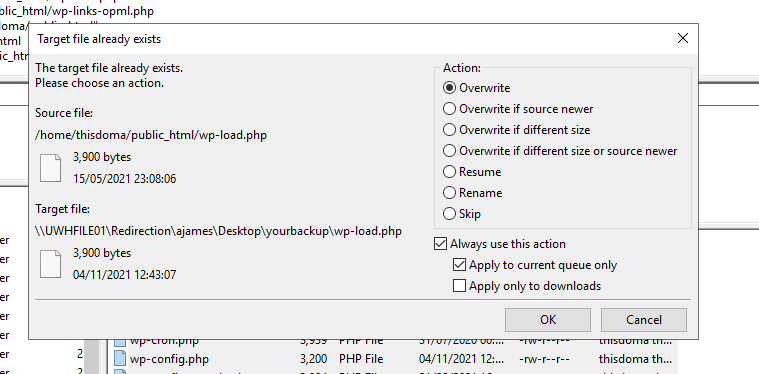
- Sometimes a duplicate file warning will appear. This even happens if the files transferred are correct. This error appears because duplicates at the destination need to be overwritten. Ensuring the displayed content is correct.
- To do this under action, select overwrite and then tick both always use this action & apply to current queue only. Click OK to proceed, it will clear the entire queue with this selection.
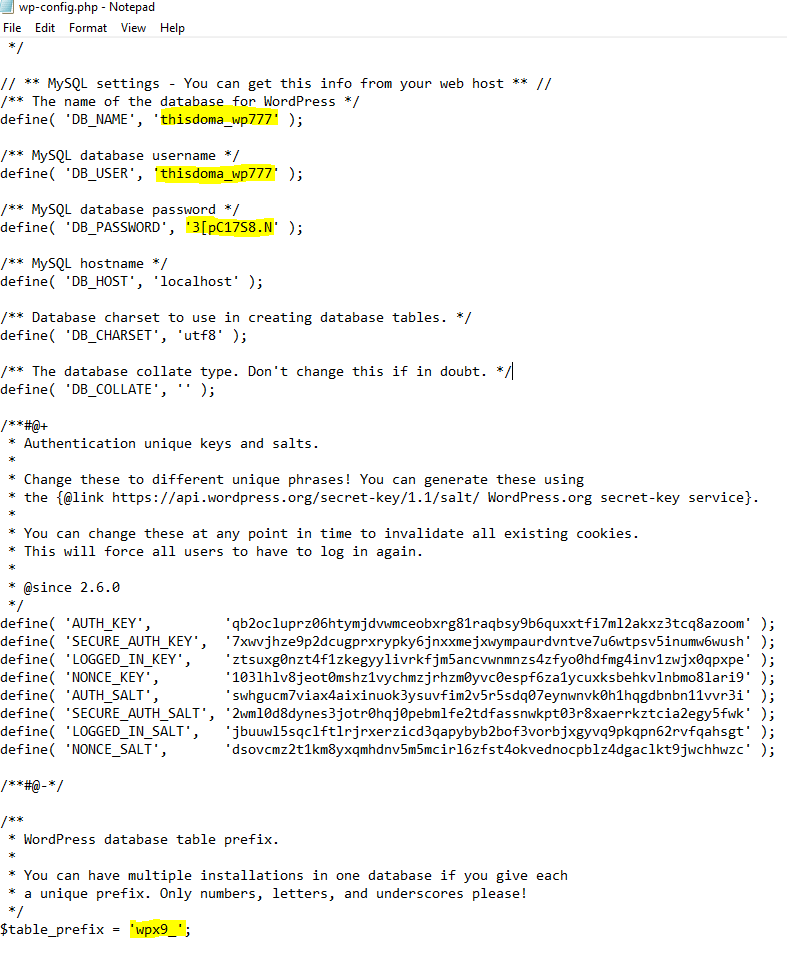
- Once the download completes, open the folder and navigate to the wp-config.php file, this file provides you with information on the adjoined database. Including DB_NAME, table_prefix and user credentials. Without these details, WordPress won’t be able to access the database and your site won’t work.
Stage 2: Access phpMyAdmin
The phpMyAdmin application is the same for both cPanel and Plesk. However, accessing it is different for each control panel, if you don’t know how to access phpMyAdmin the following should help.
cPanel
- First off, login to your cPanel control panel.
- In cPanel, under the databases’ section, click phpMyAdmin. This will load the phpMyAdmin dashboard.

- After accessing phpMyAdmin, follow on from the phpMyAdmin guide.
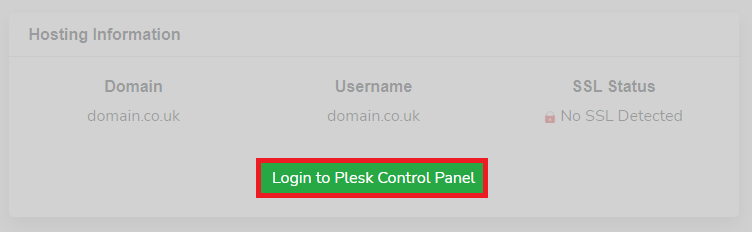
Plesk
- Login to your Plesk control panel.
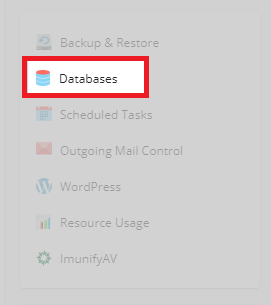
- From your domain overview (main area) in Plesk. In the feature’s sidebar on the right, click Databases. This takes you to the Plesk database tool, from here you can perform some basic actions and access phpMyAdmin.
- Sometimes you might have more than one database listed. Check the database name against the one in your wp-config.php file, and click on the phpMyAdmin icon for that database.

- From the phpMyAdmin dashboard area, follow on from the above phpMyAdmin guide.
Stage 3: Export your database
phpMyAdmin
- Firstly, from the phpMyAdmin dashboard. Make sure the correct database name is showing, use the wp-config.php file to help.
- Afterwards, click on that database to select it.
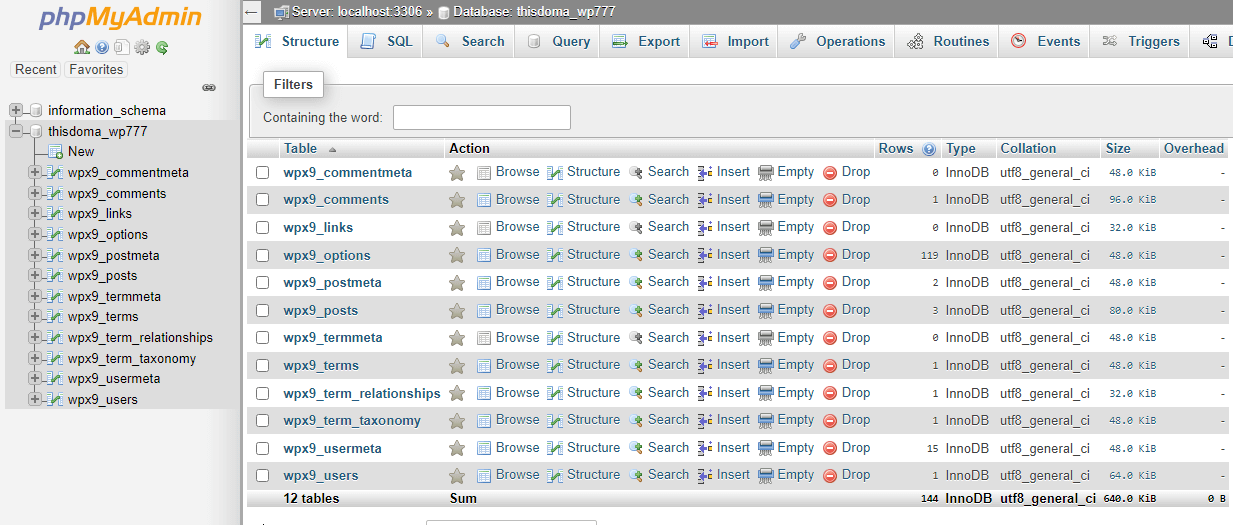
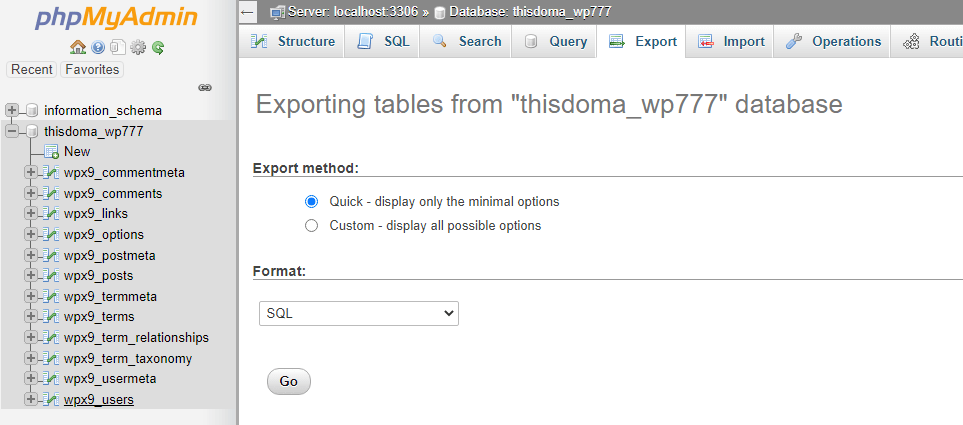
- With the correct database selected, click on Export in the top navbar.
- After entering the Export tool, click Go.
- A file explorer or pop-up notification should appear. From here, you need to choose the location to save the exported database to. Find your backup folder and save it inside to make it easier.